| Topic | Post |
| Pre-Delivery | |
| Previous Vehicles | |
| Garage Preparation | |
| Escort Passport 9500ci Pictures | |
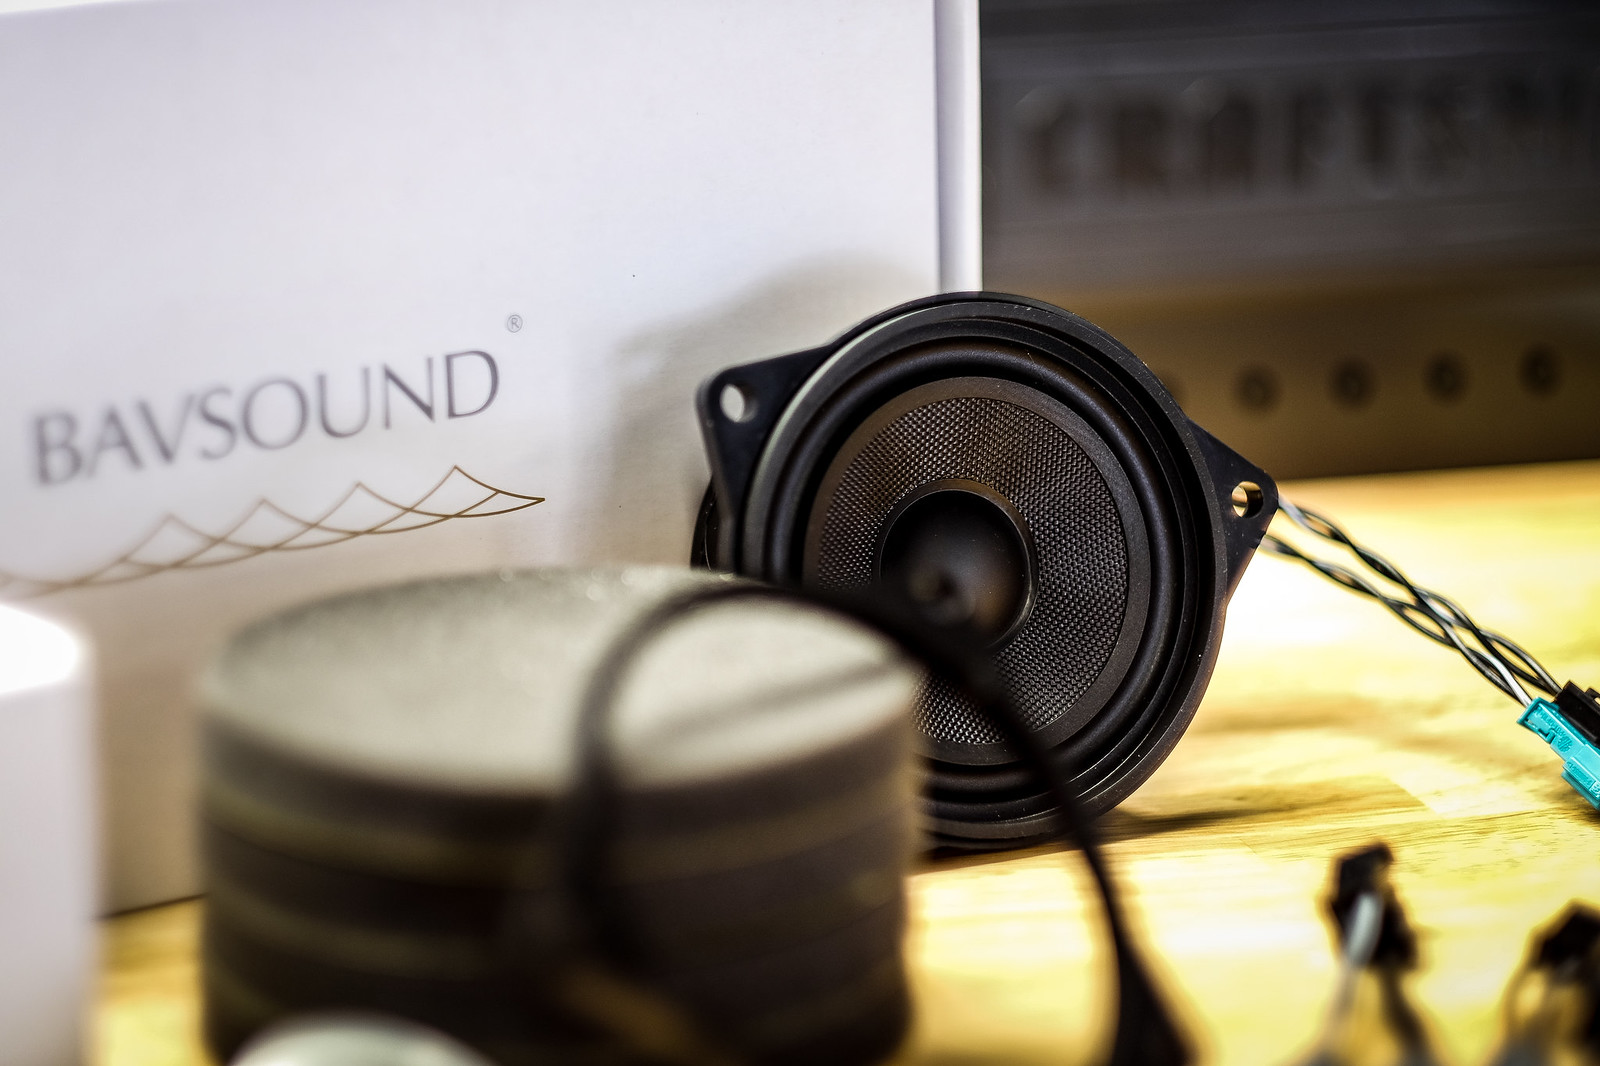
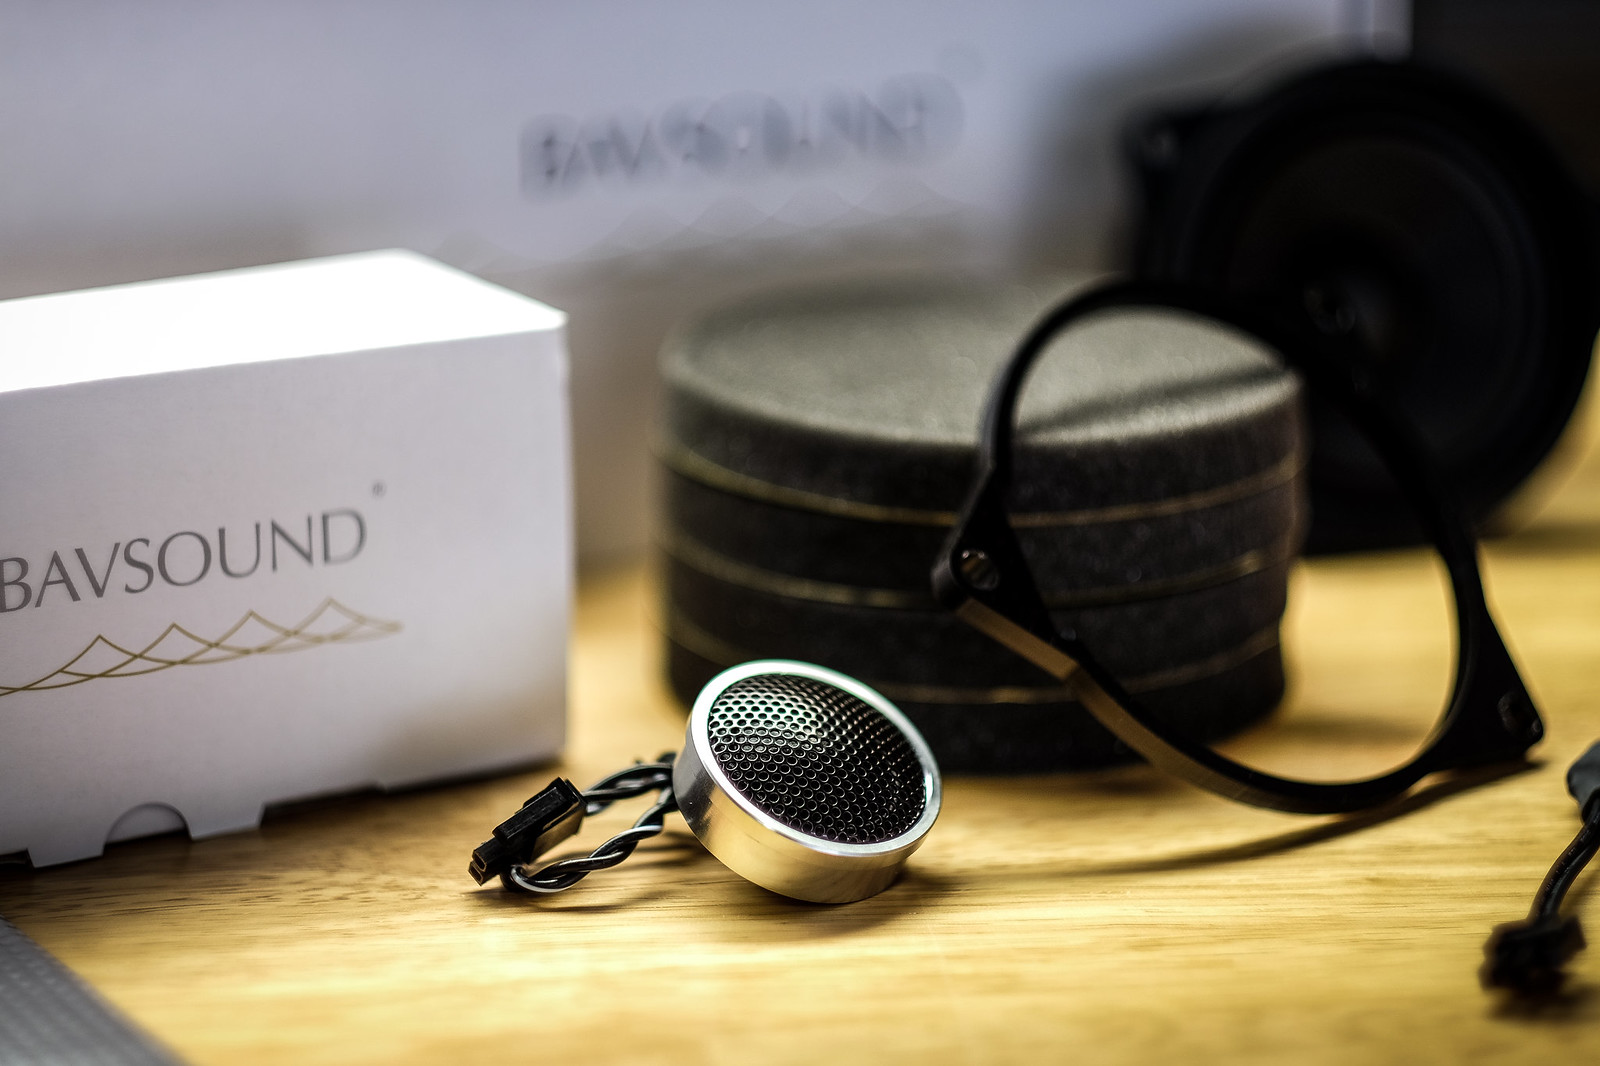
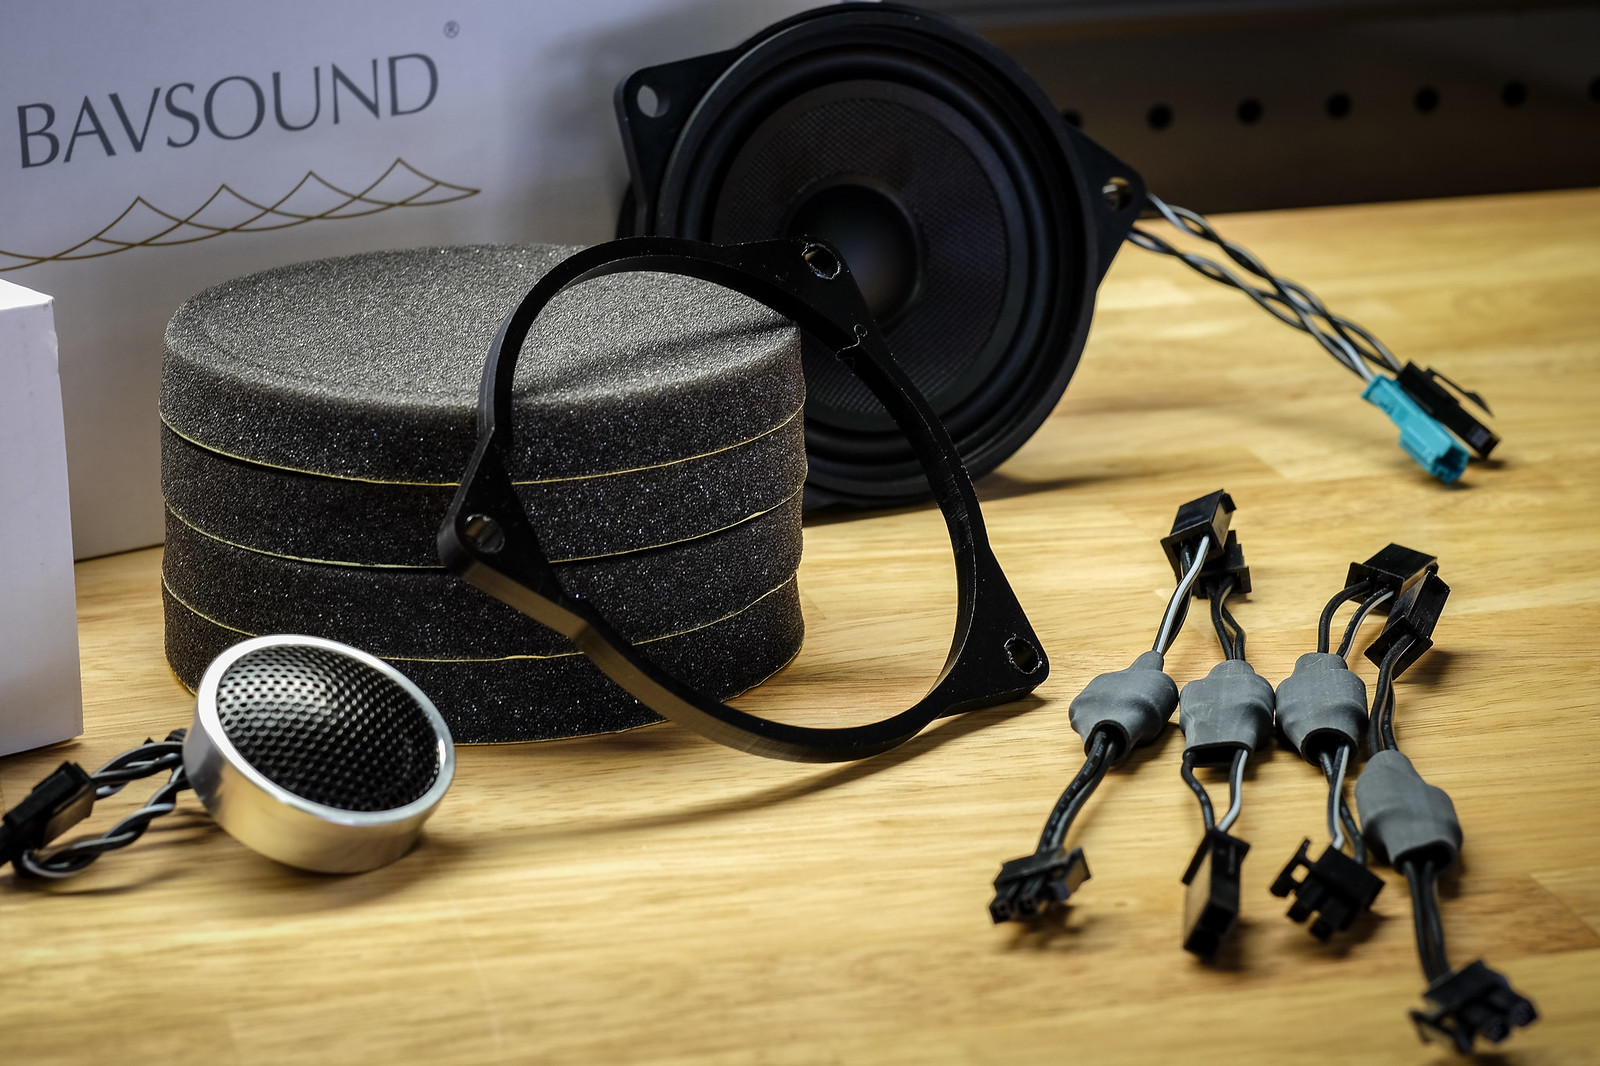
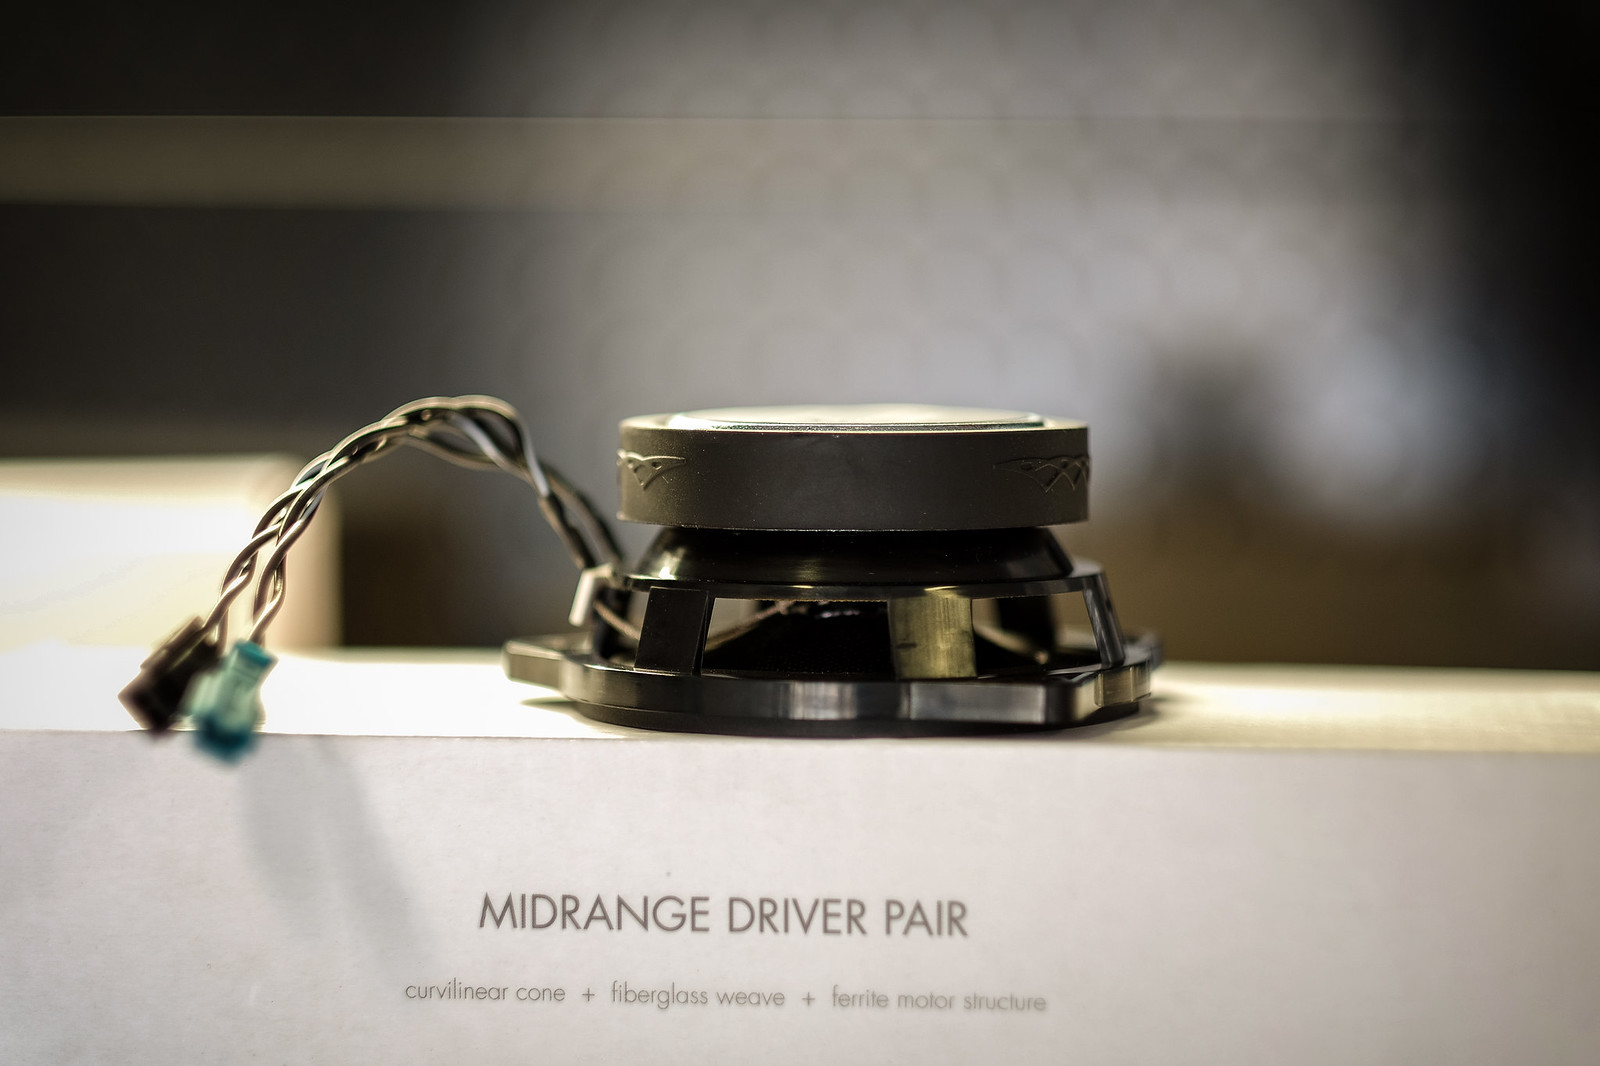
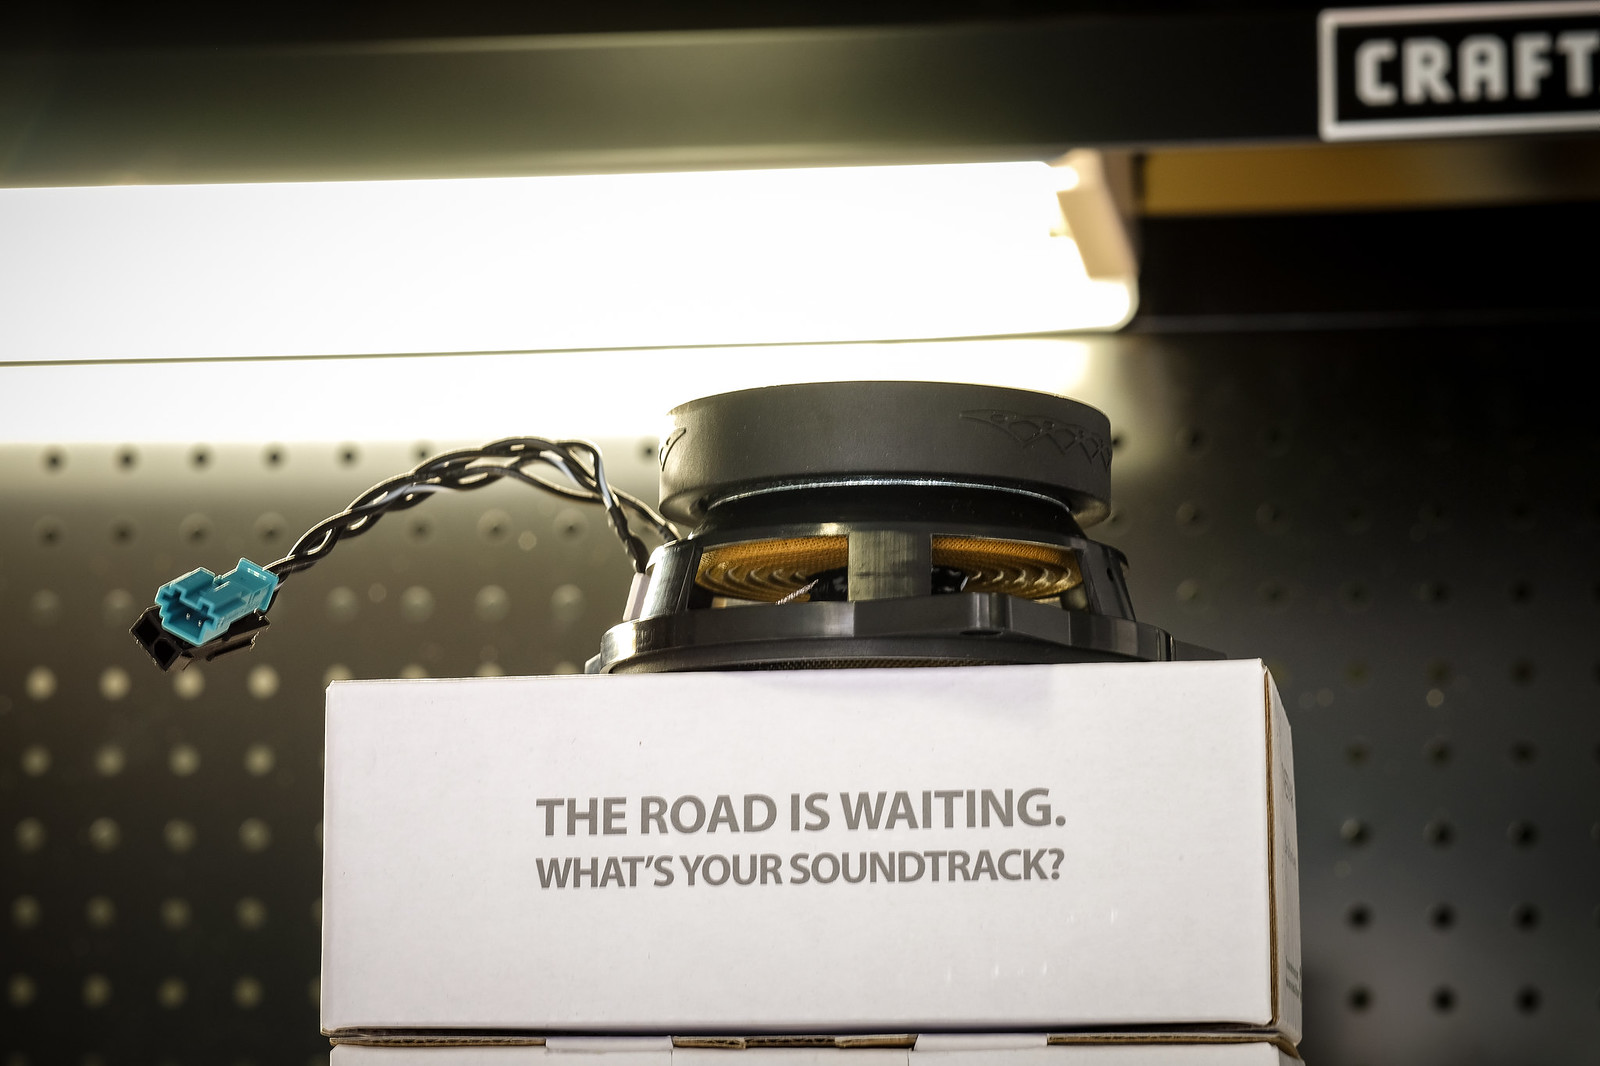
| BAVSOUND Stage 1 Pictures | |
| Parts Negotiation (PM for pricing) | |
| Delivery & First Pictures | |
| First "Real" Pictures | |
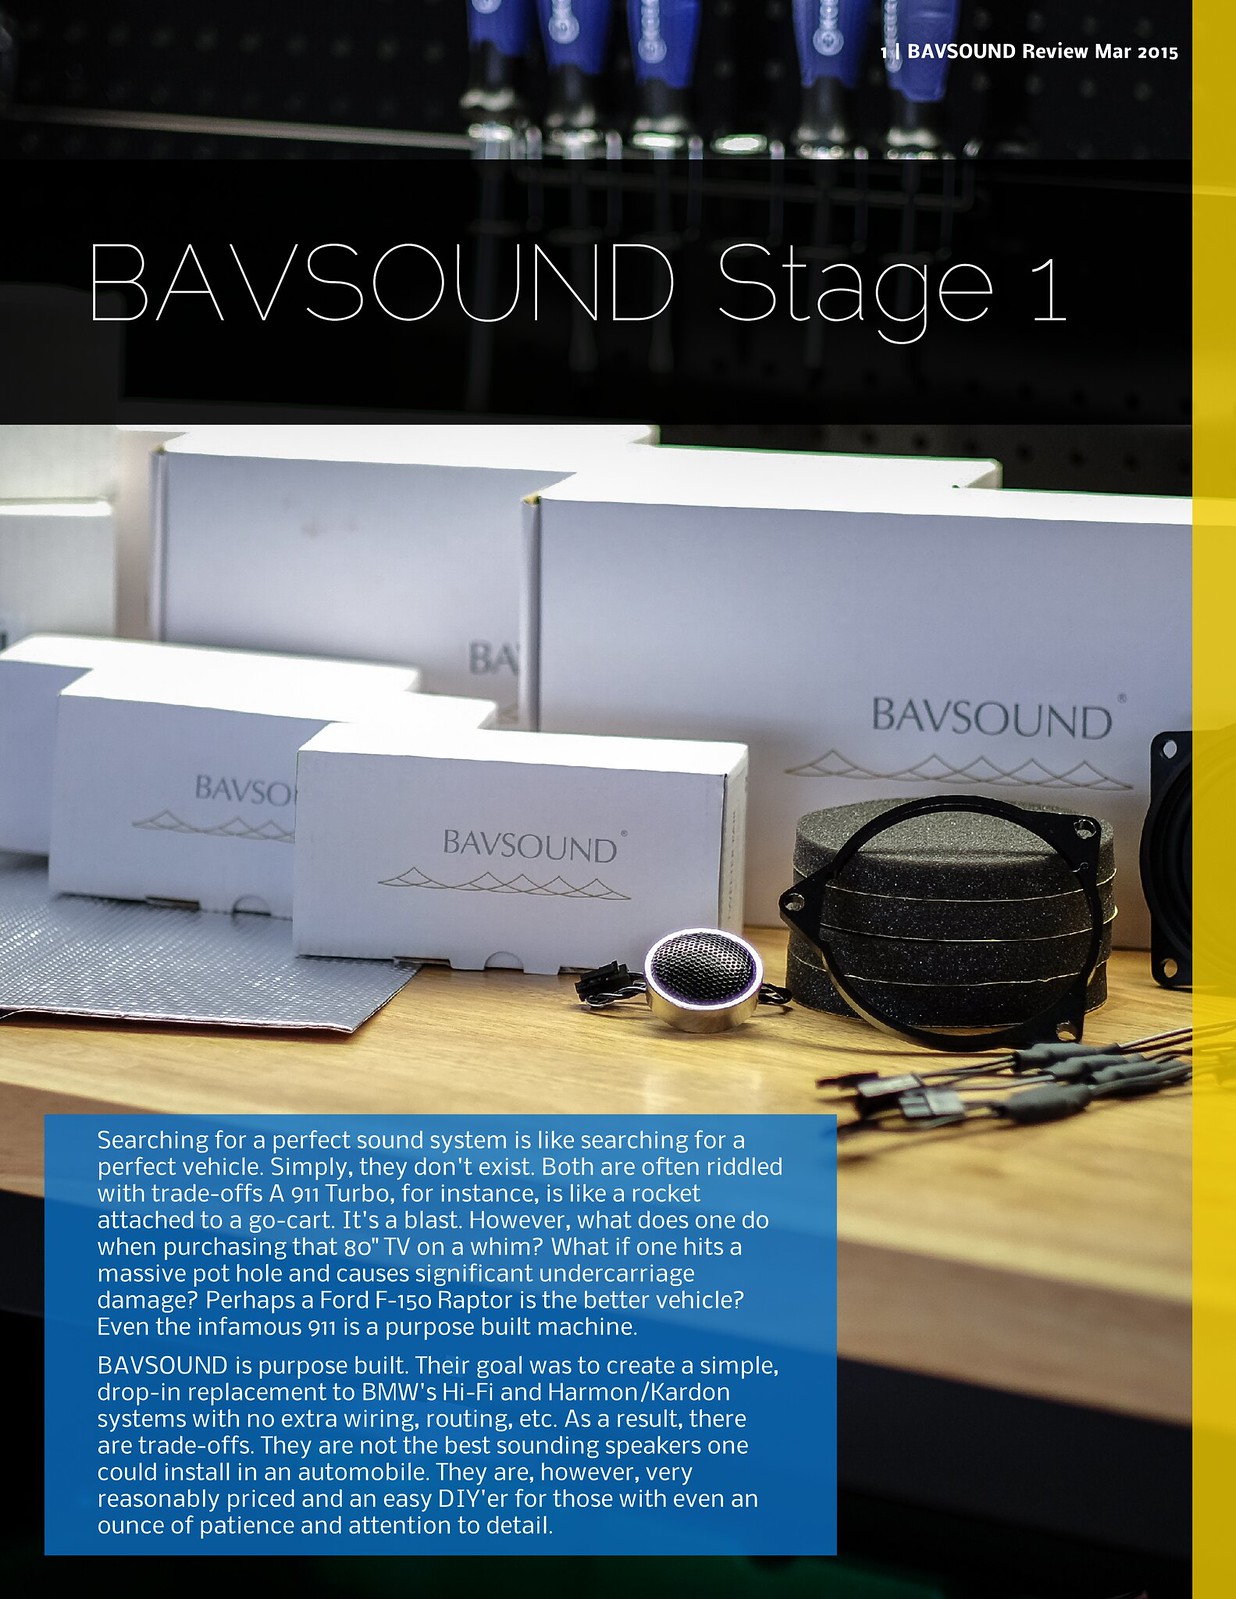
| BAVSOUND Stage 1 Review | |
| E90 & F80 M3 Photos | |
| iND Cosmetic Package Install | |
| Escort Passport 9500ci Review | |
| Pictures - 04/05/2015 | |
| Dyno Run - Stock | |
| Pictures - 05/31/2015 | |
| Photo & Editing Tips | |
| DINANTRONICS Stage 1 Review | |
| A stroll through River Oaks... (Pictures) | |
| M3 Love (Pictures) | |
| Harris Hill Raceway - First Ever Track Event | |
| BMW CCA Houston - July 2015 | |
| Charcoal Filter Delete | |
| Silo Picture Shoot | |
Magazine Layout


Traditional Layout
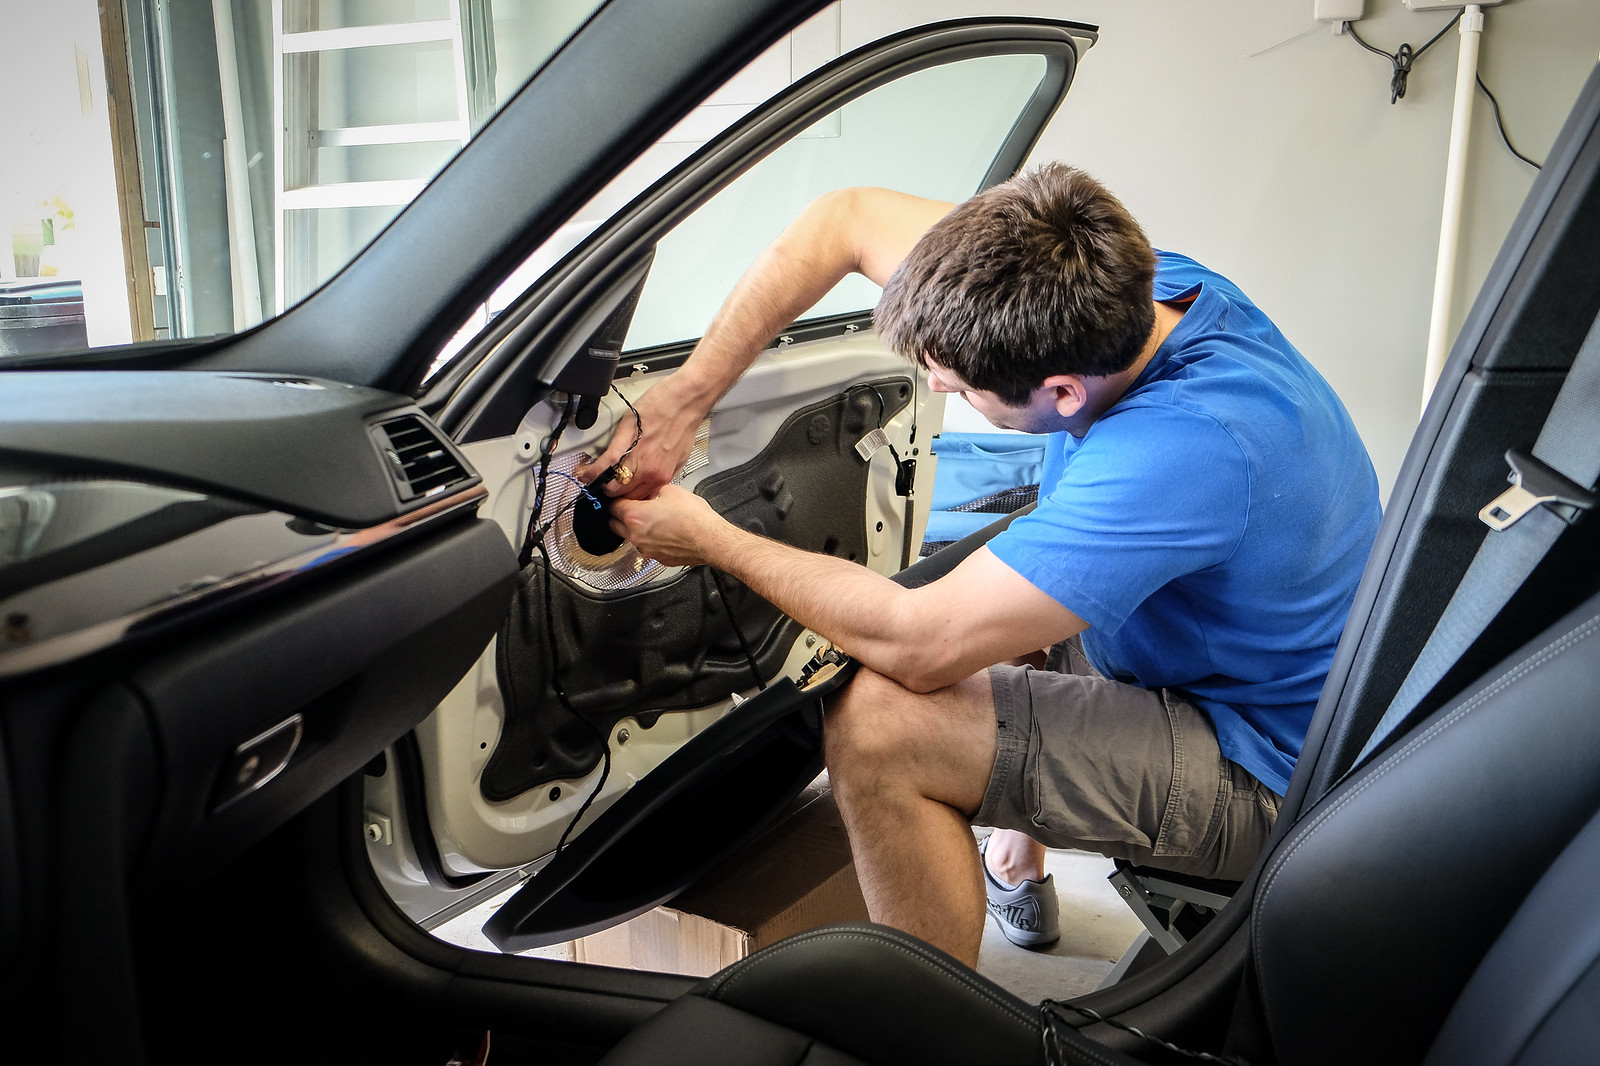
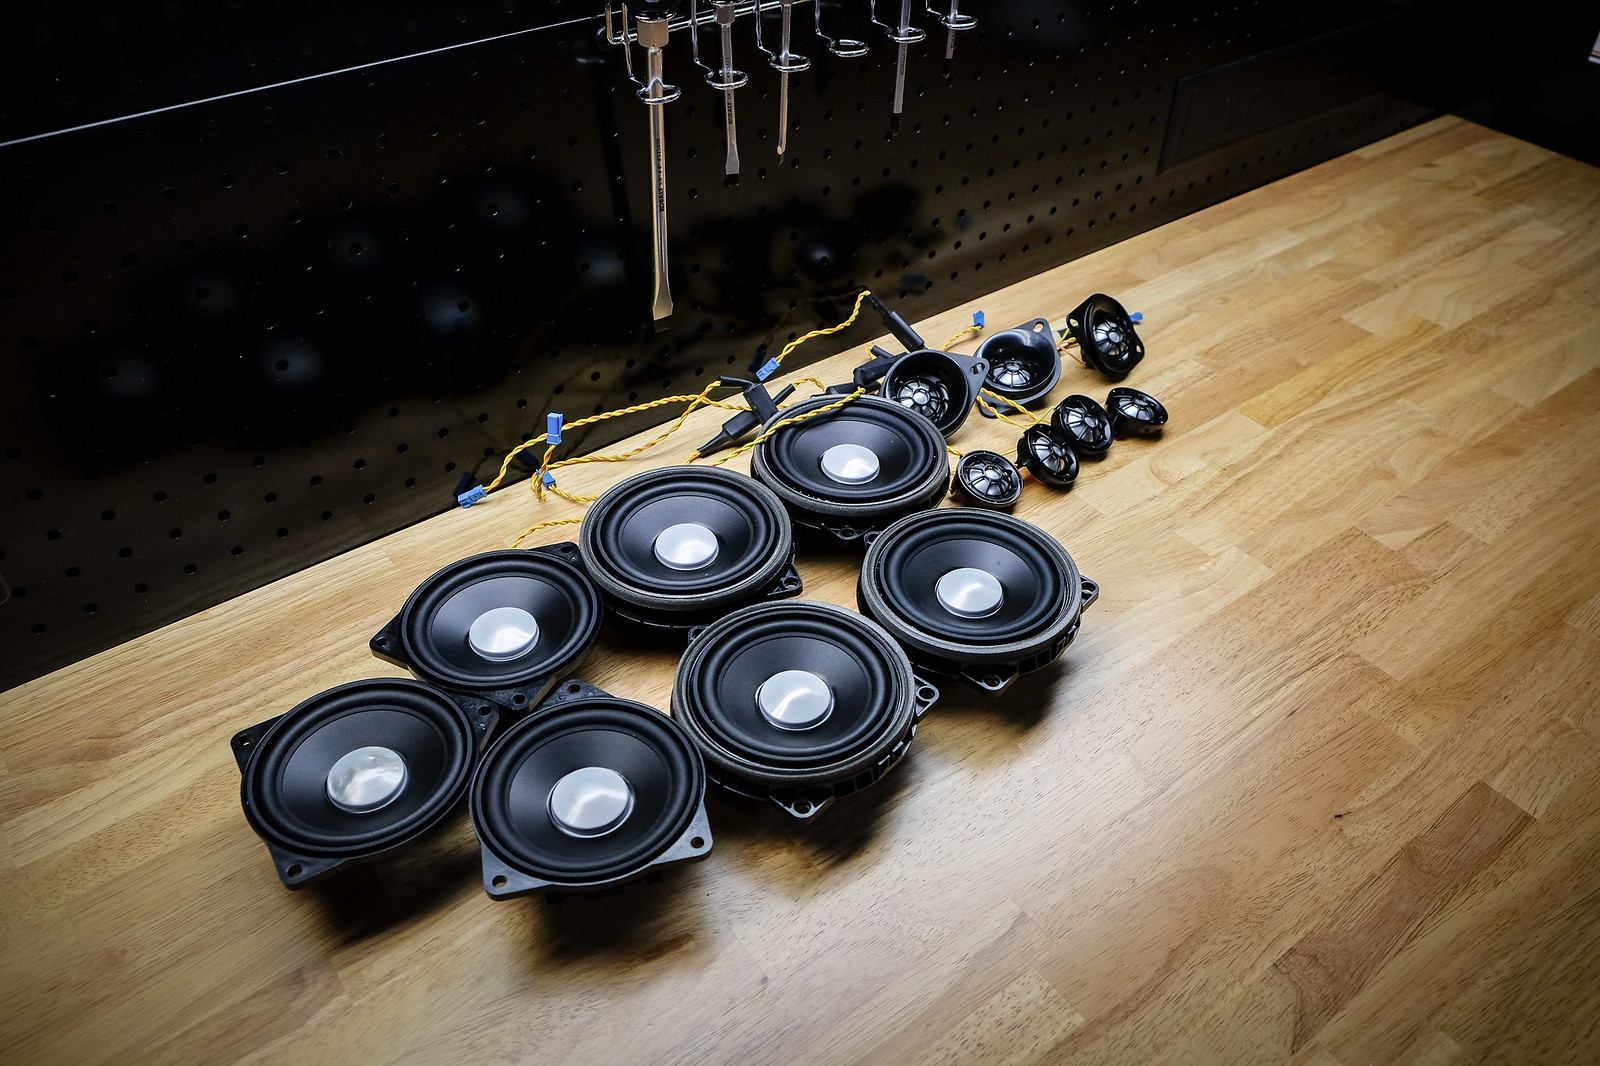
Installation

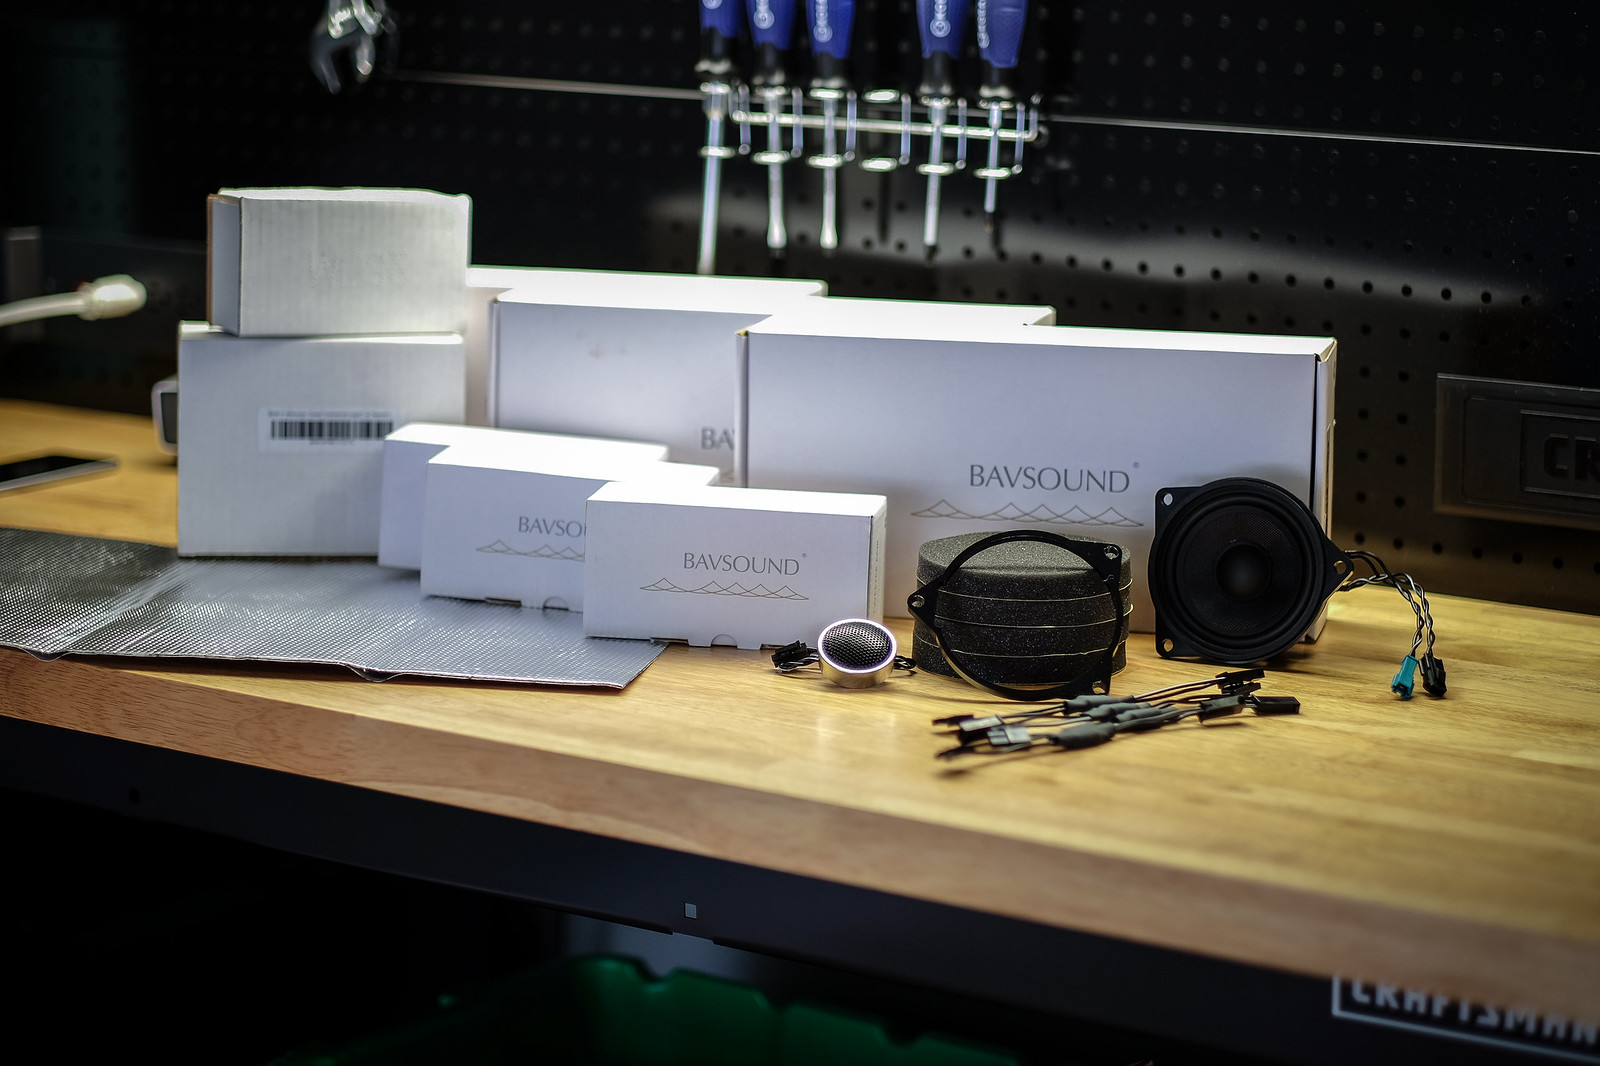
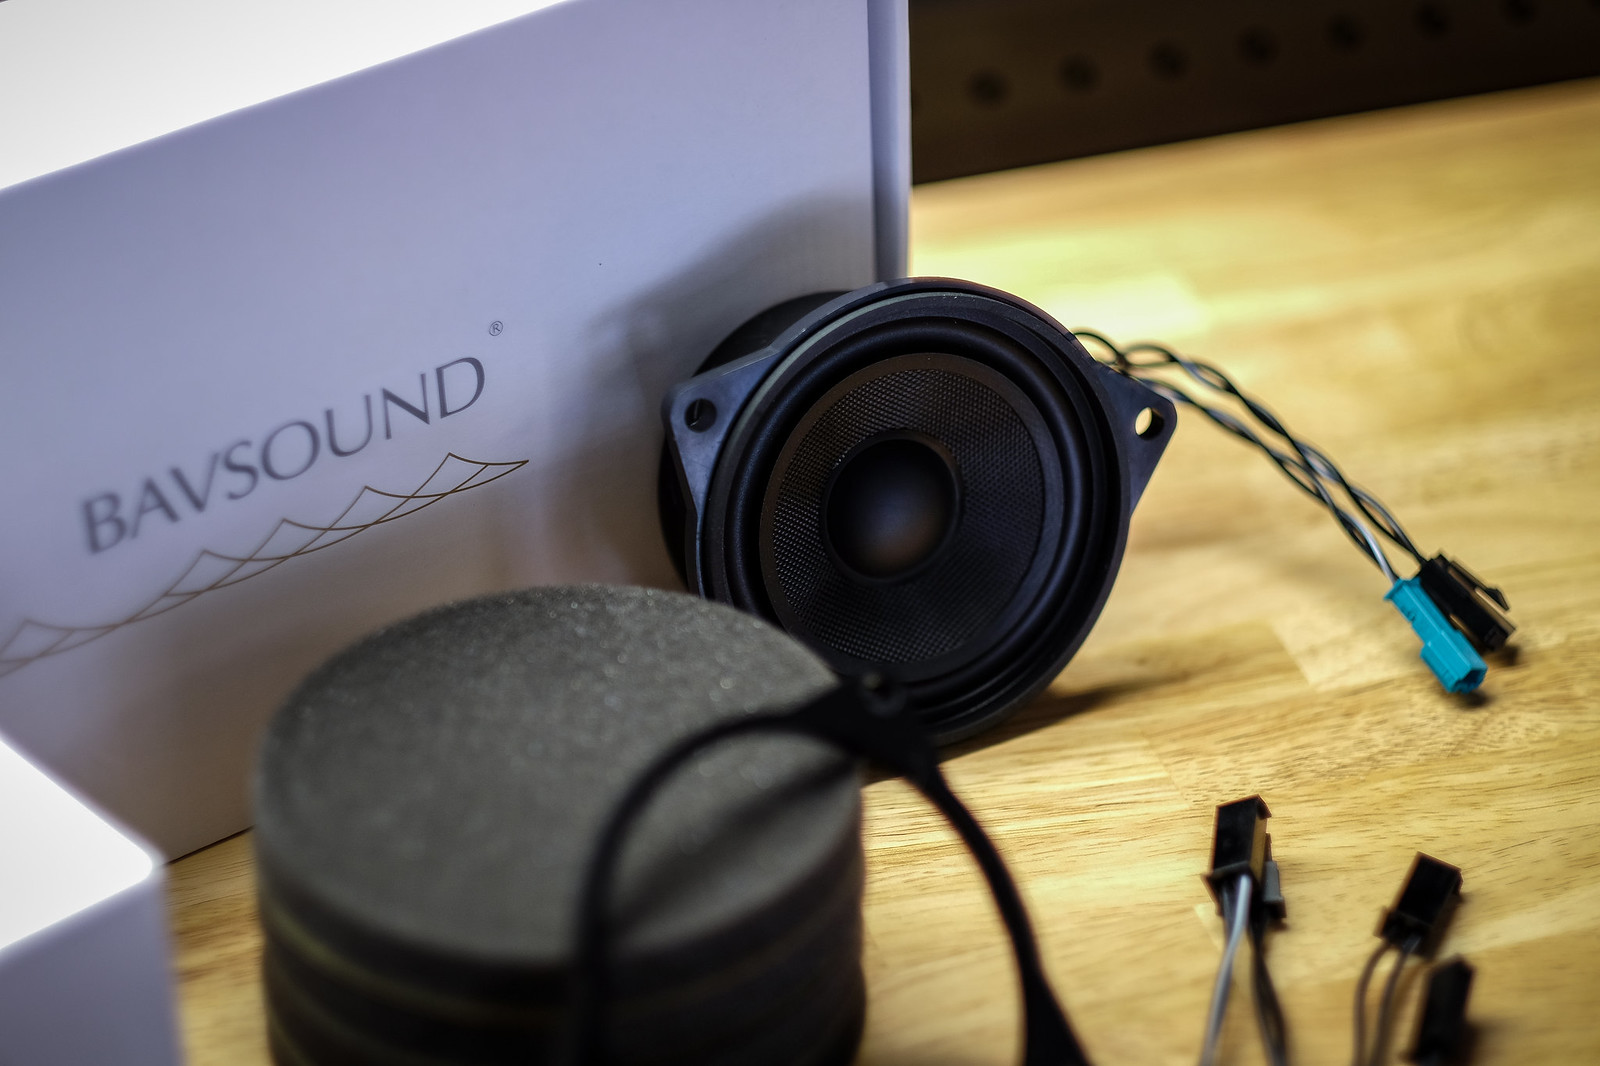


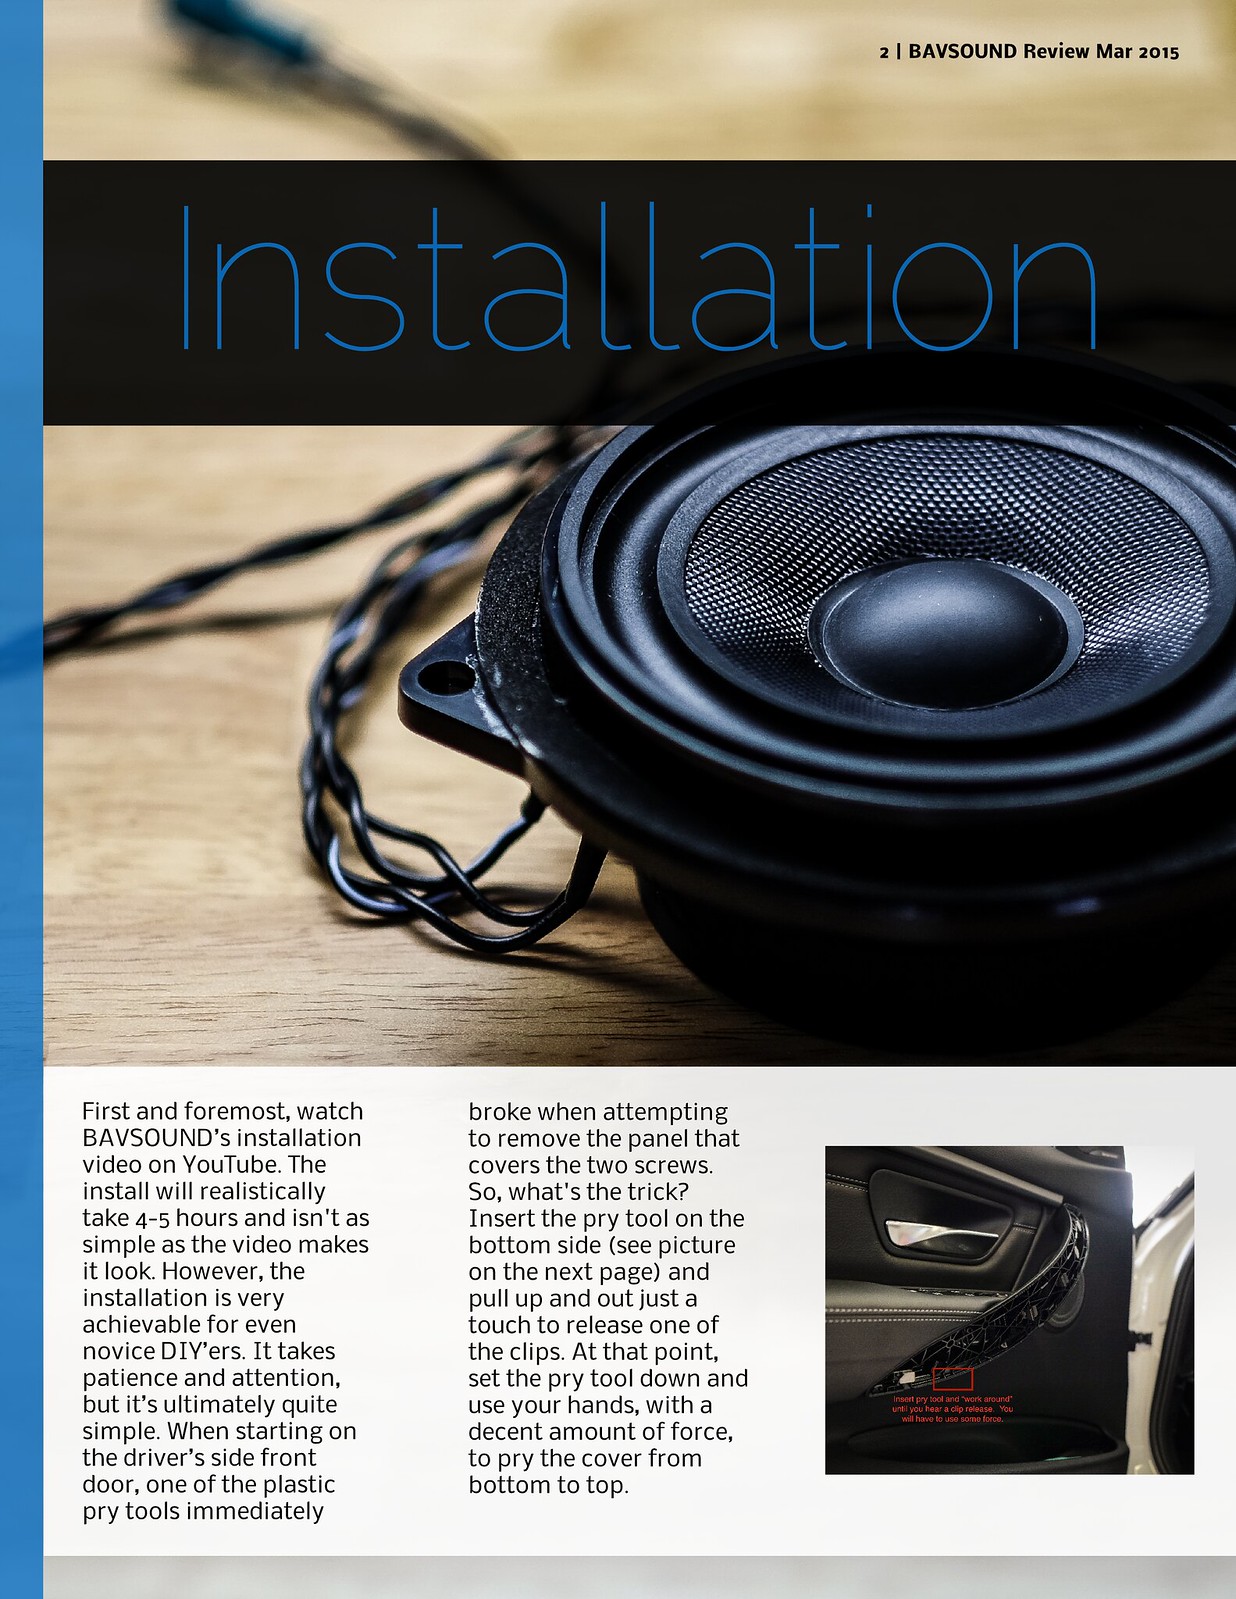
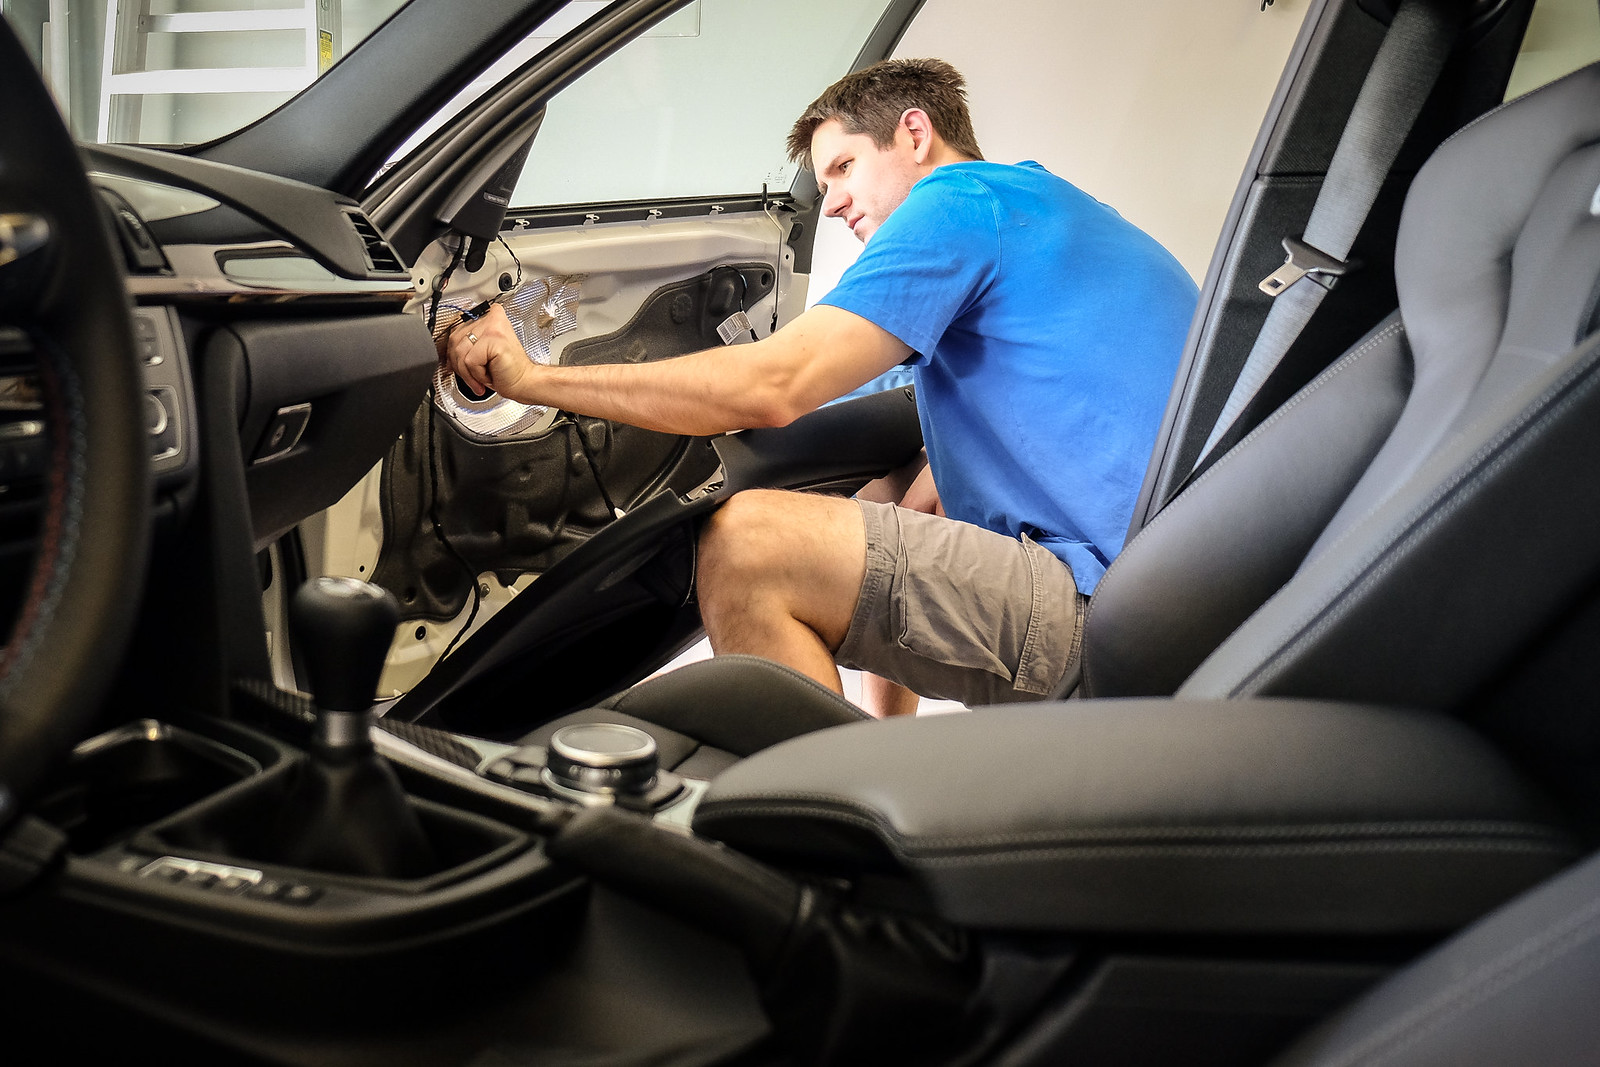
First and foremost, watch BAVSOUNDs installation video on YouTube. The install will realistically take 4-5 hours and isn't as simple as the video makes it look. However, the installation is very achievable for even novice DIYers. It takes patience and attention, but its ultimately quite simple. When starting on the drivers side front door, one of the plastic pry tools immediately broke when attempting to remove the panel that covers the two screws. So, what's the trick? Insert the pry tool on the bottom side (see picture on the next page) and pull up and out just a touch to release one of the clips. At that point, set the pry tool down and use your hands, with a decent amount of force, to pry the cover from bottom to top.

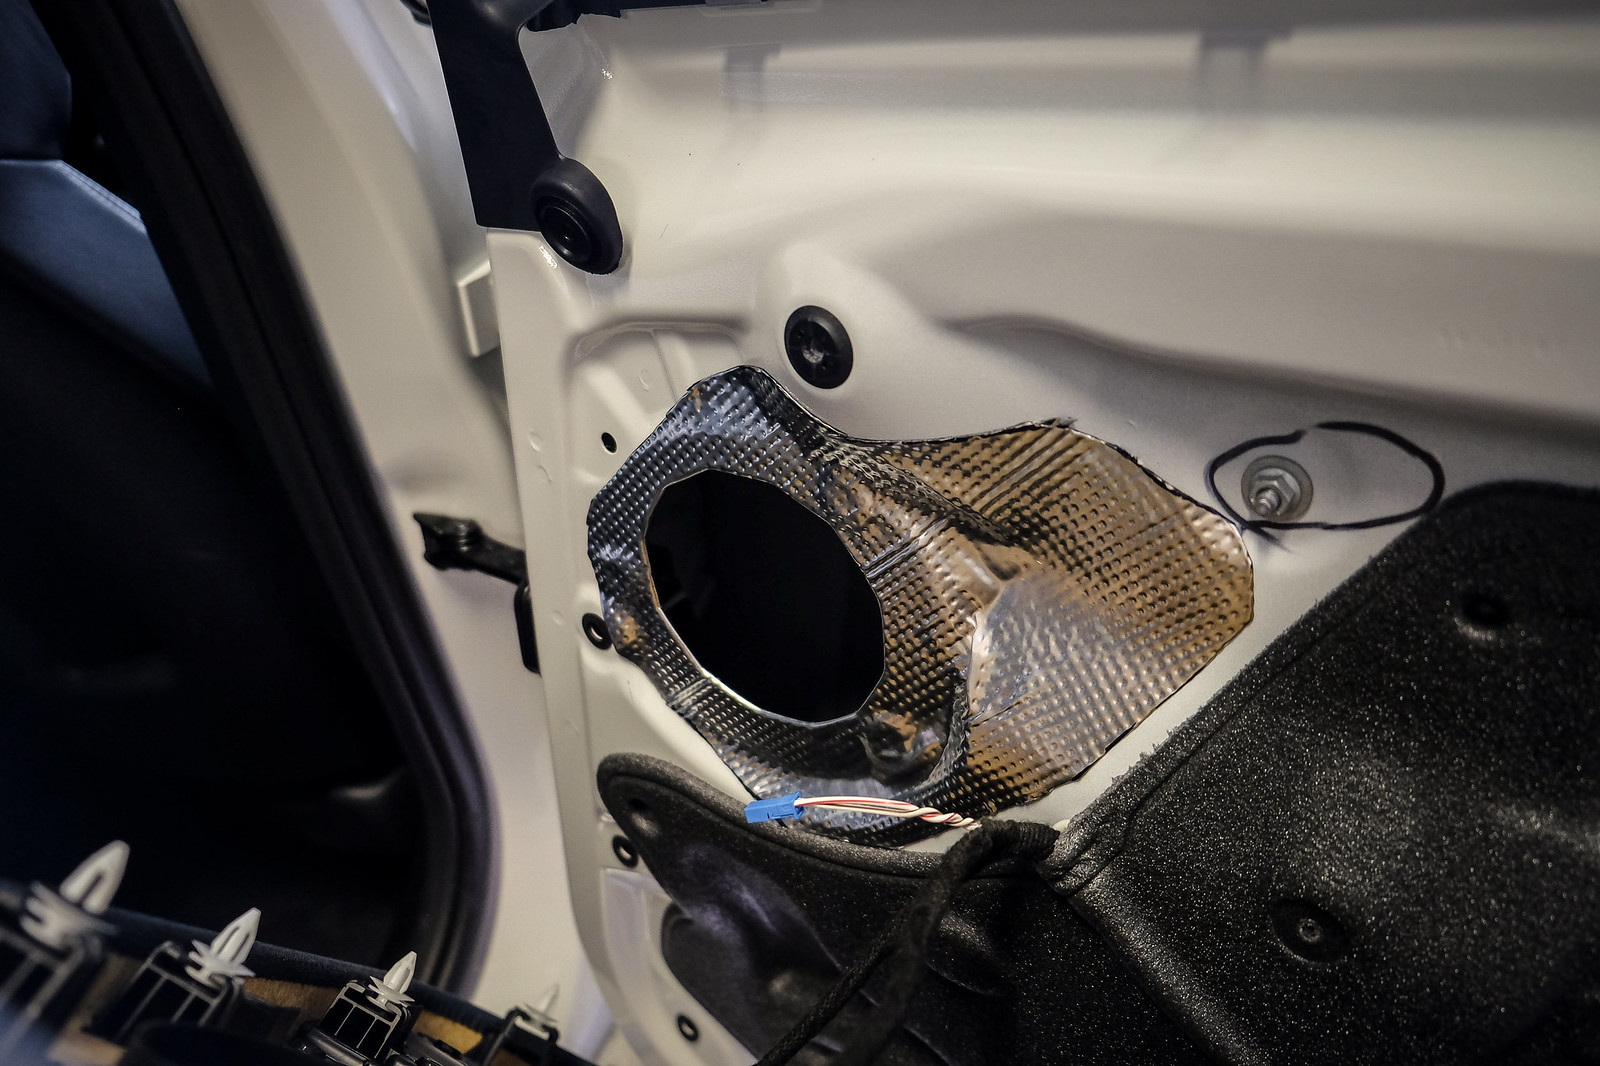
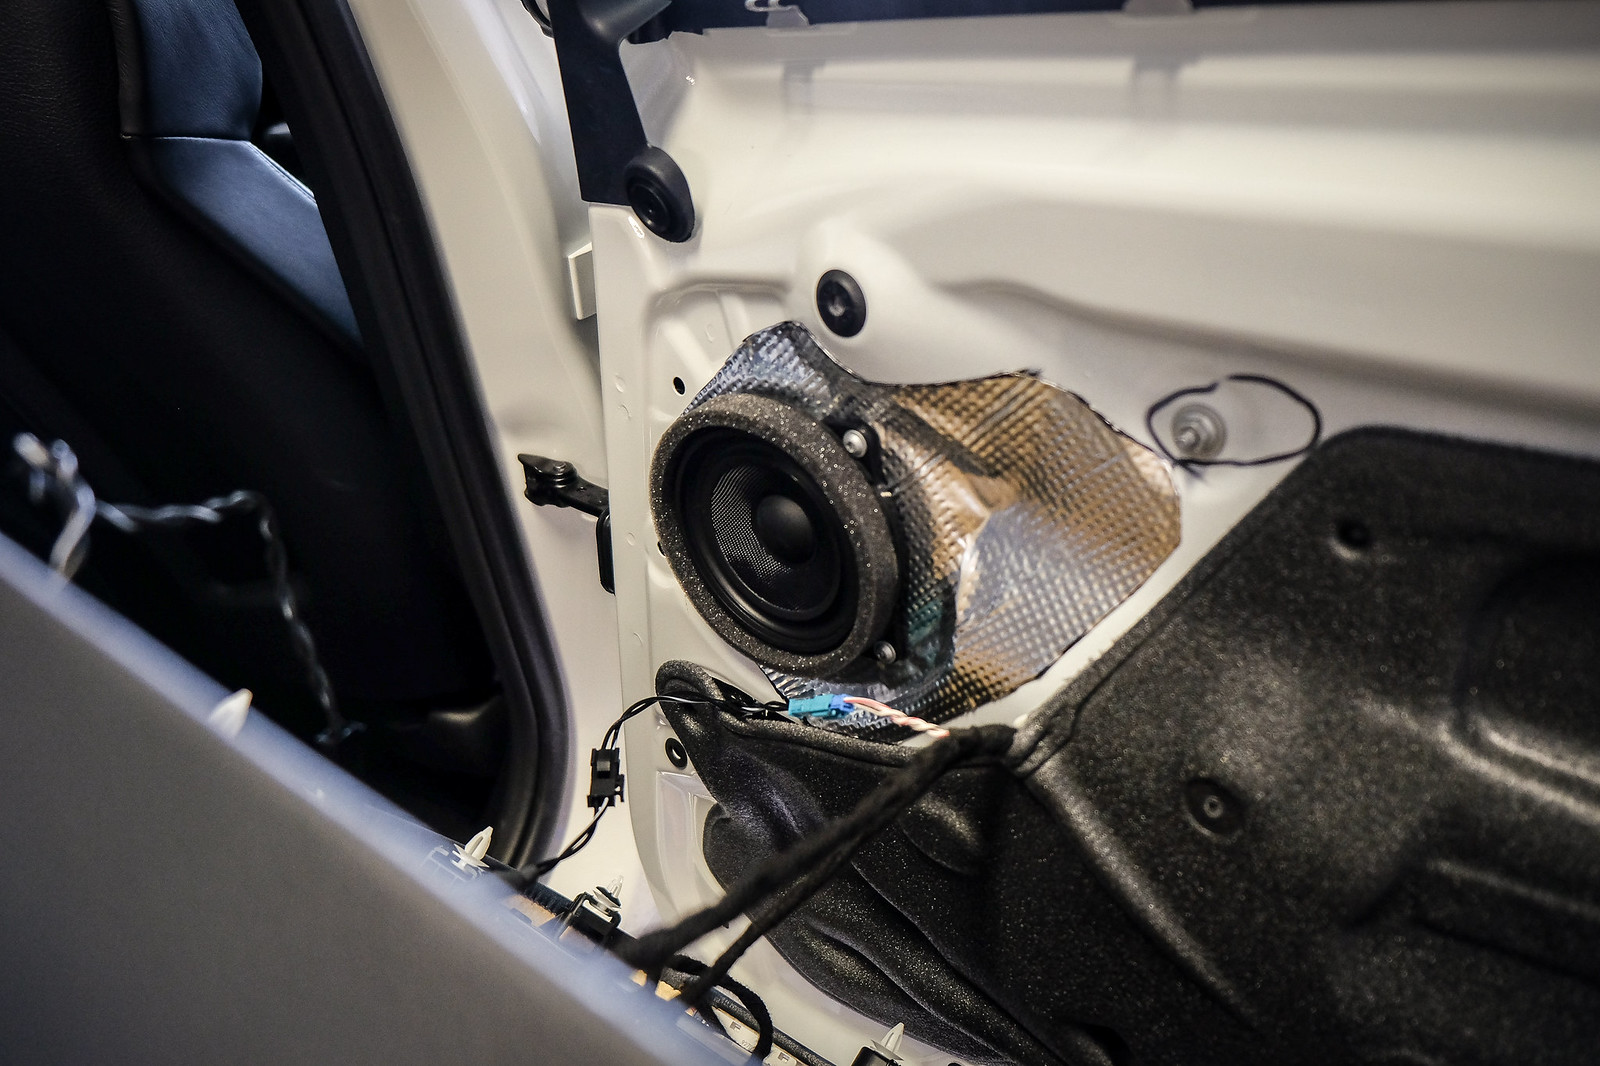
After this step, the next (very minor) trouble area was removing the door panel. However, once I realized where one of the plastic clips was located, it was easy as pie (notice the hole in the top right corner of the photo below thats where you should start prying the door panel off). One thing to note is that once you successfully replace the speakers in one door panel, the other three are much easier because youll learn how and where to separate each panel.
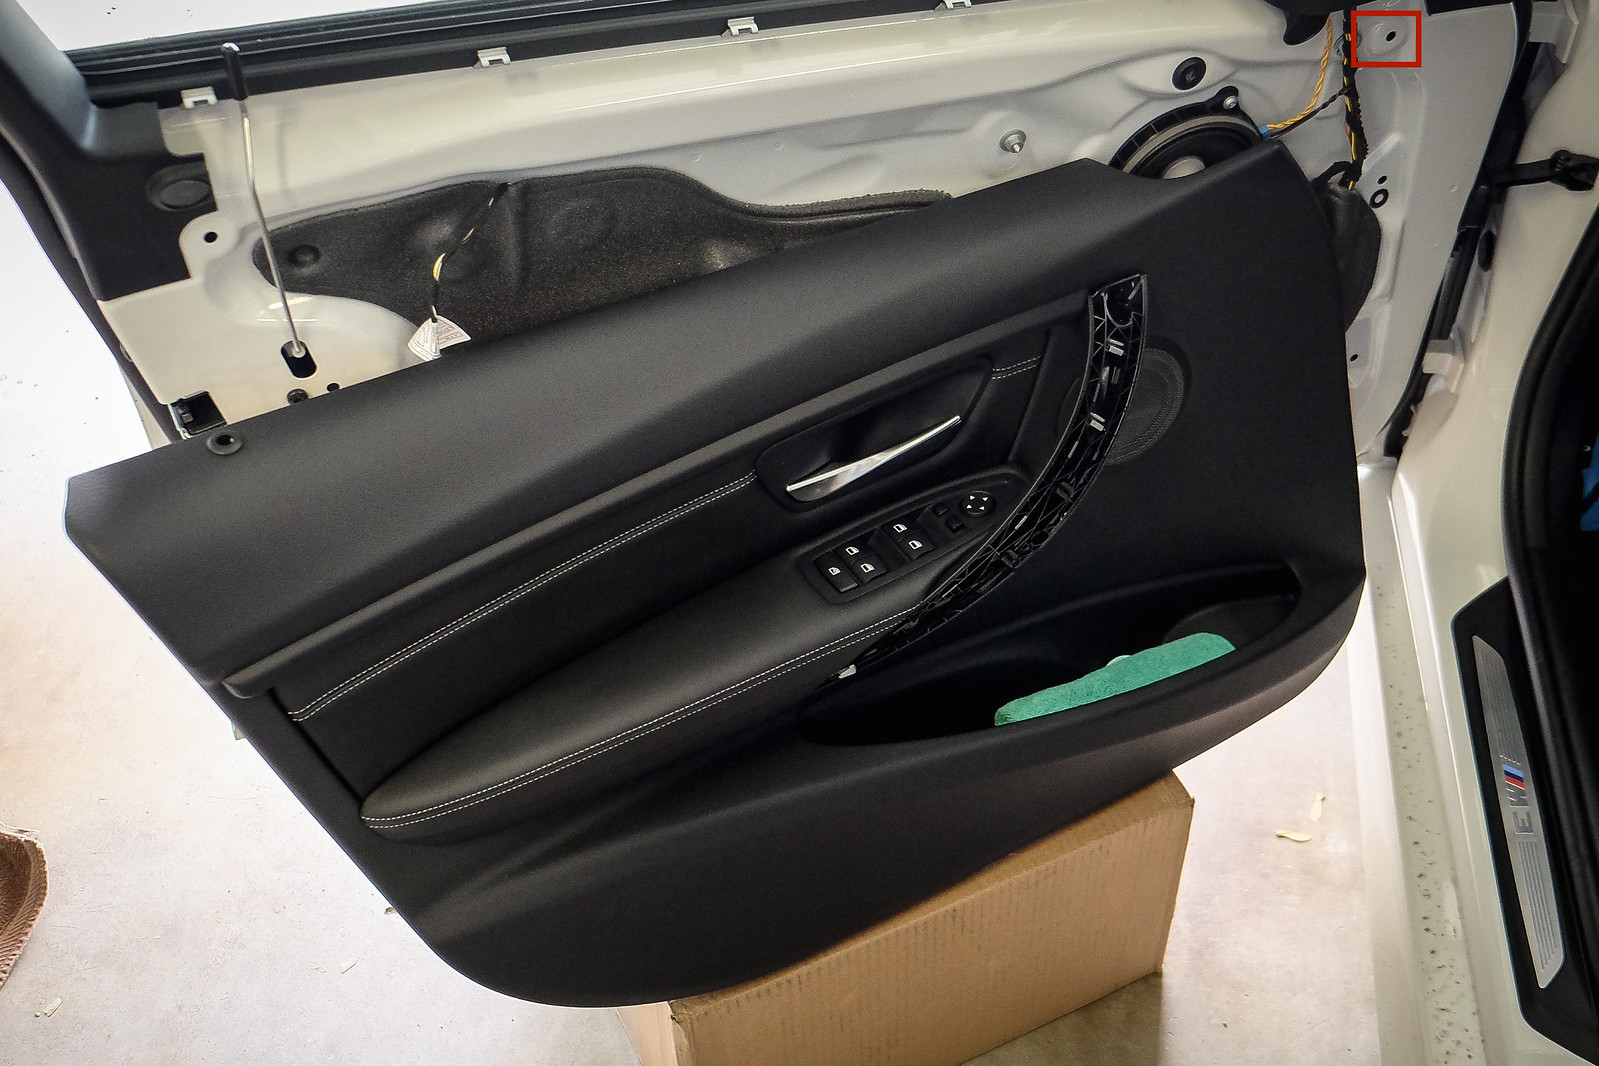
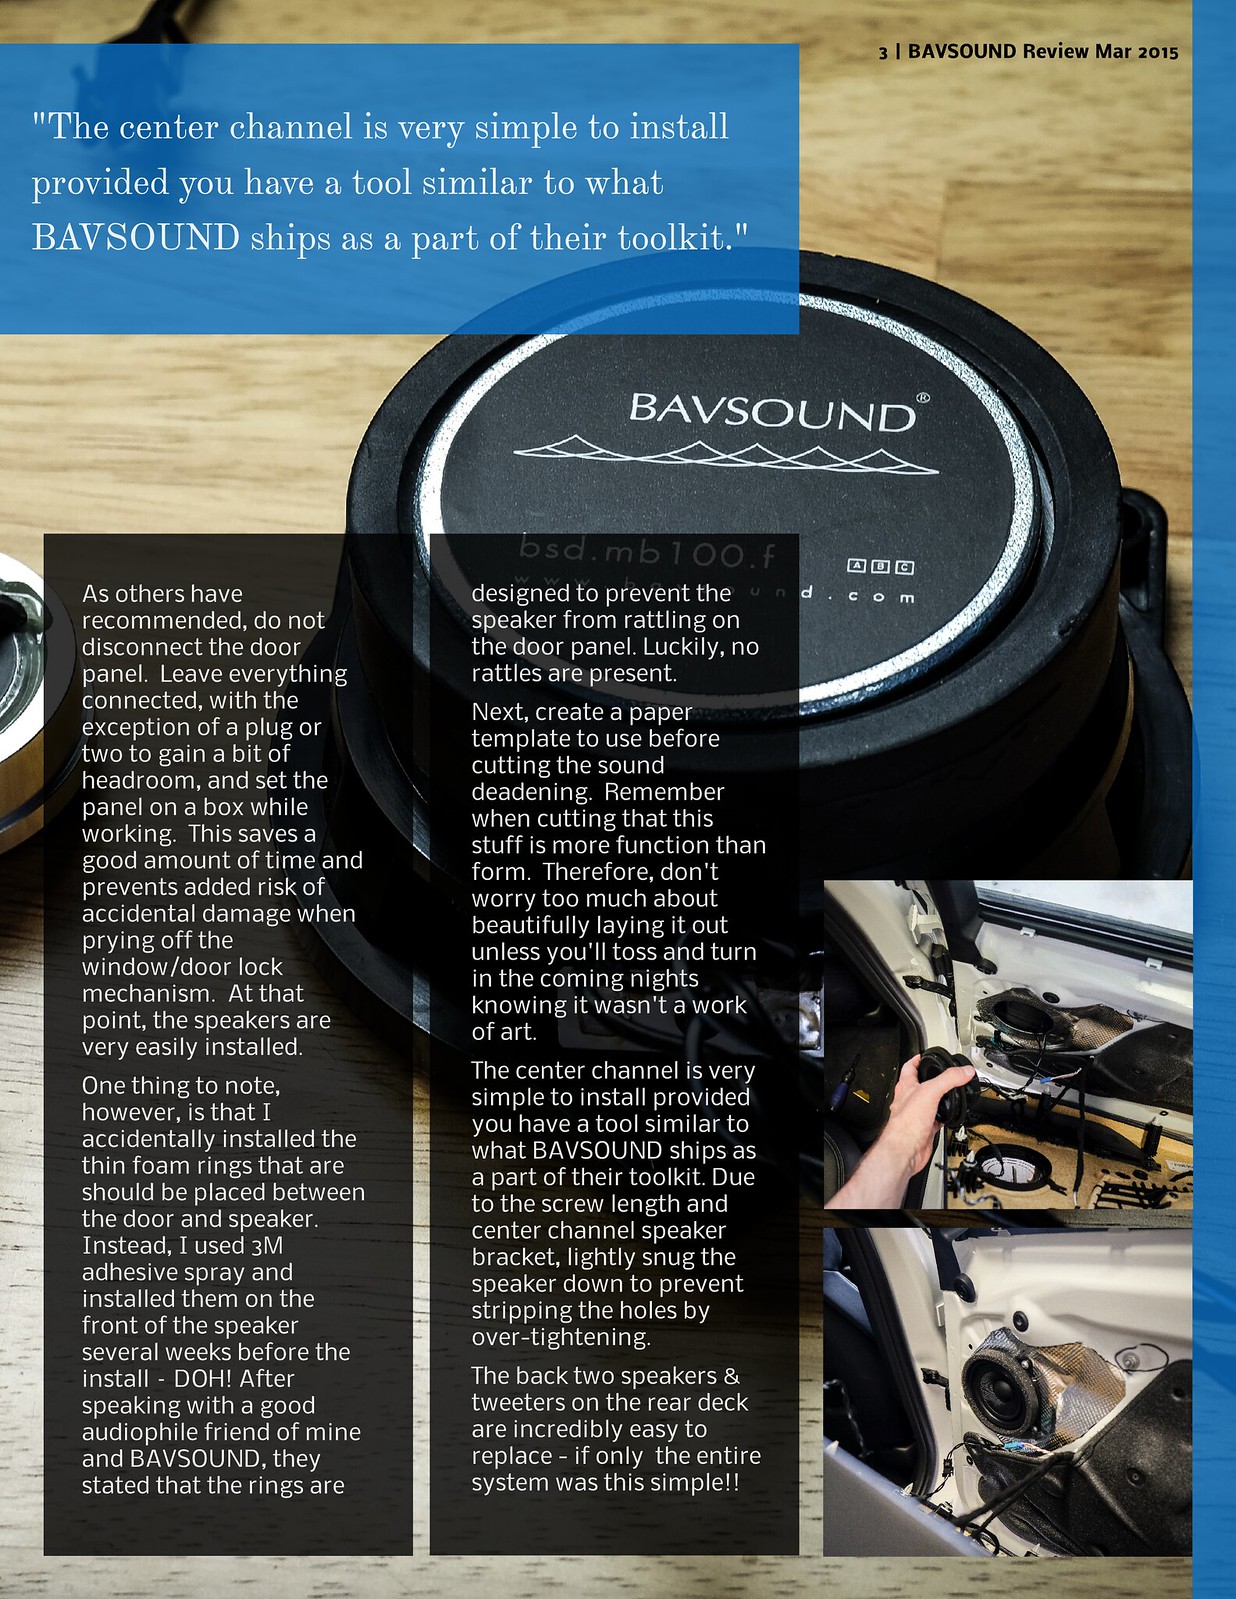
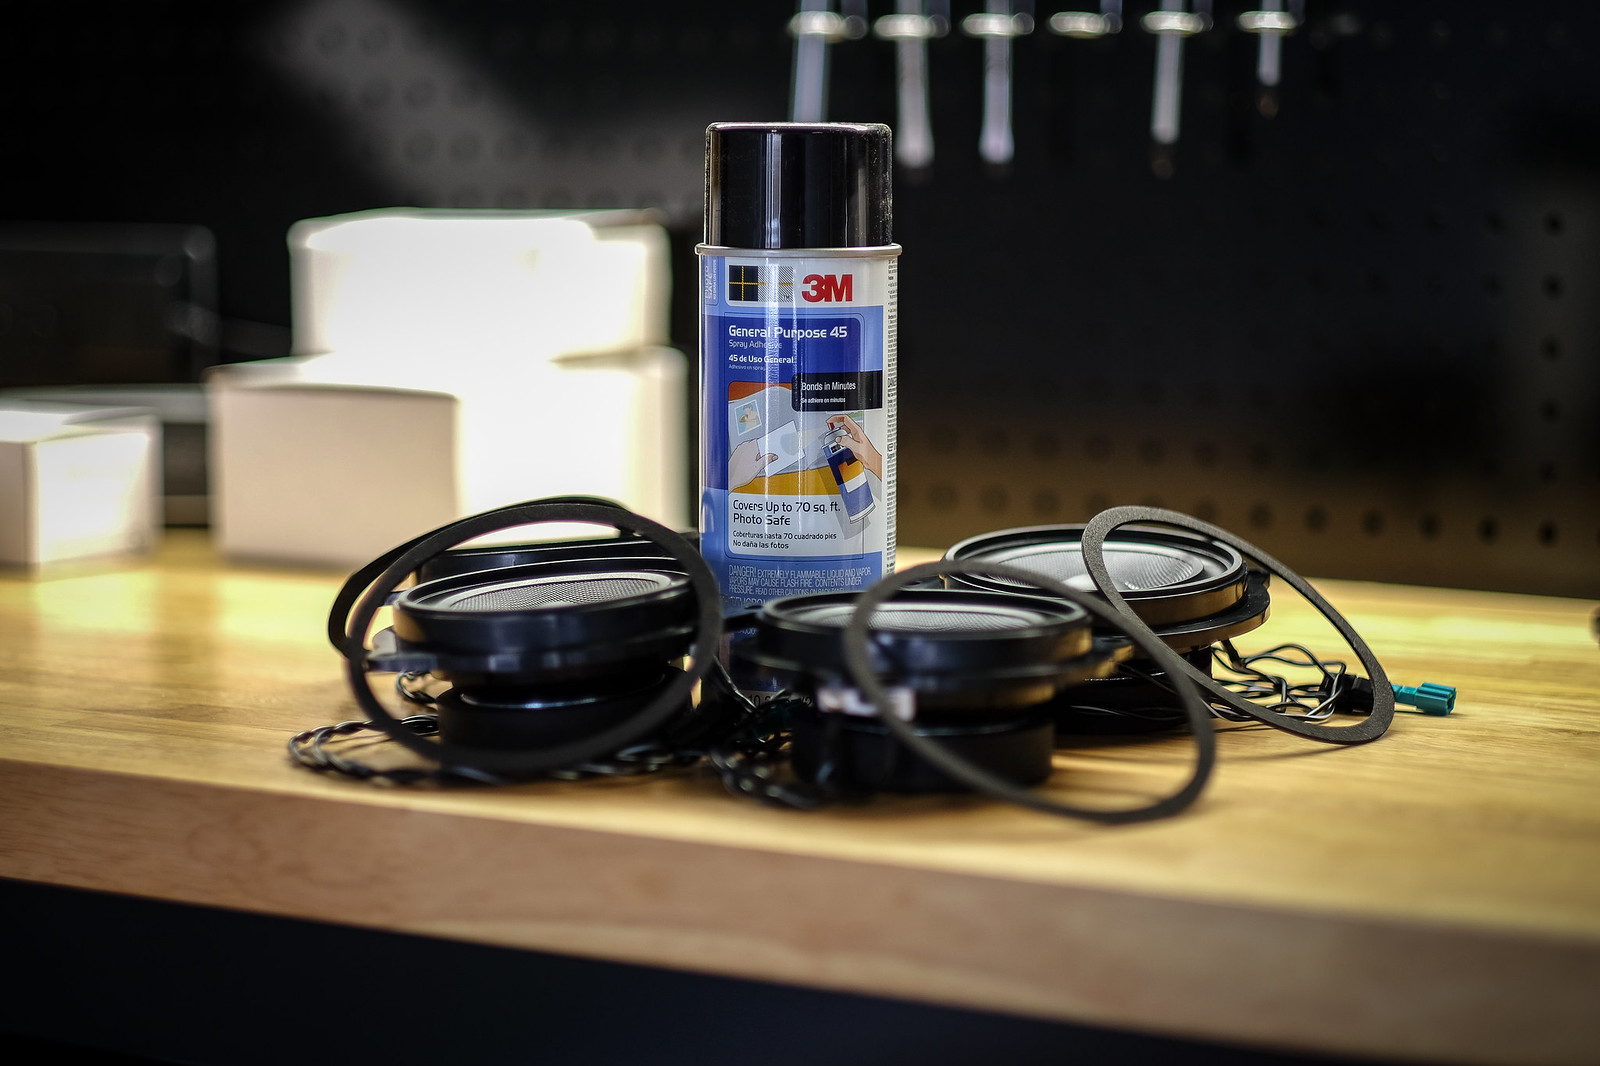
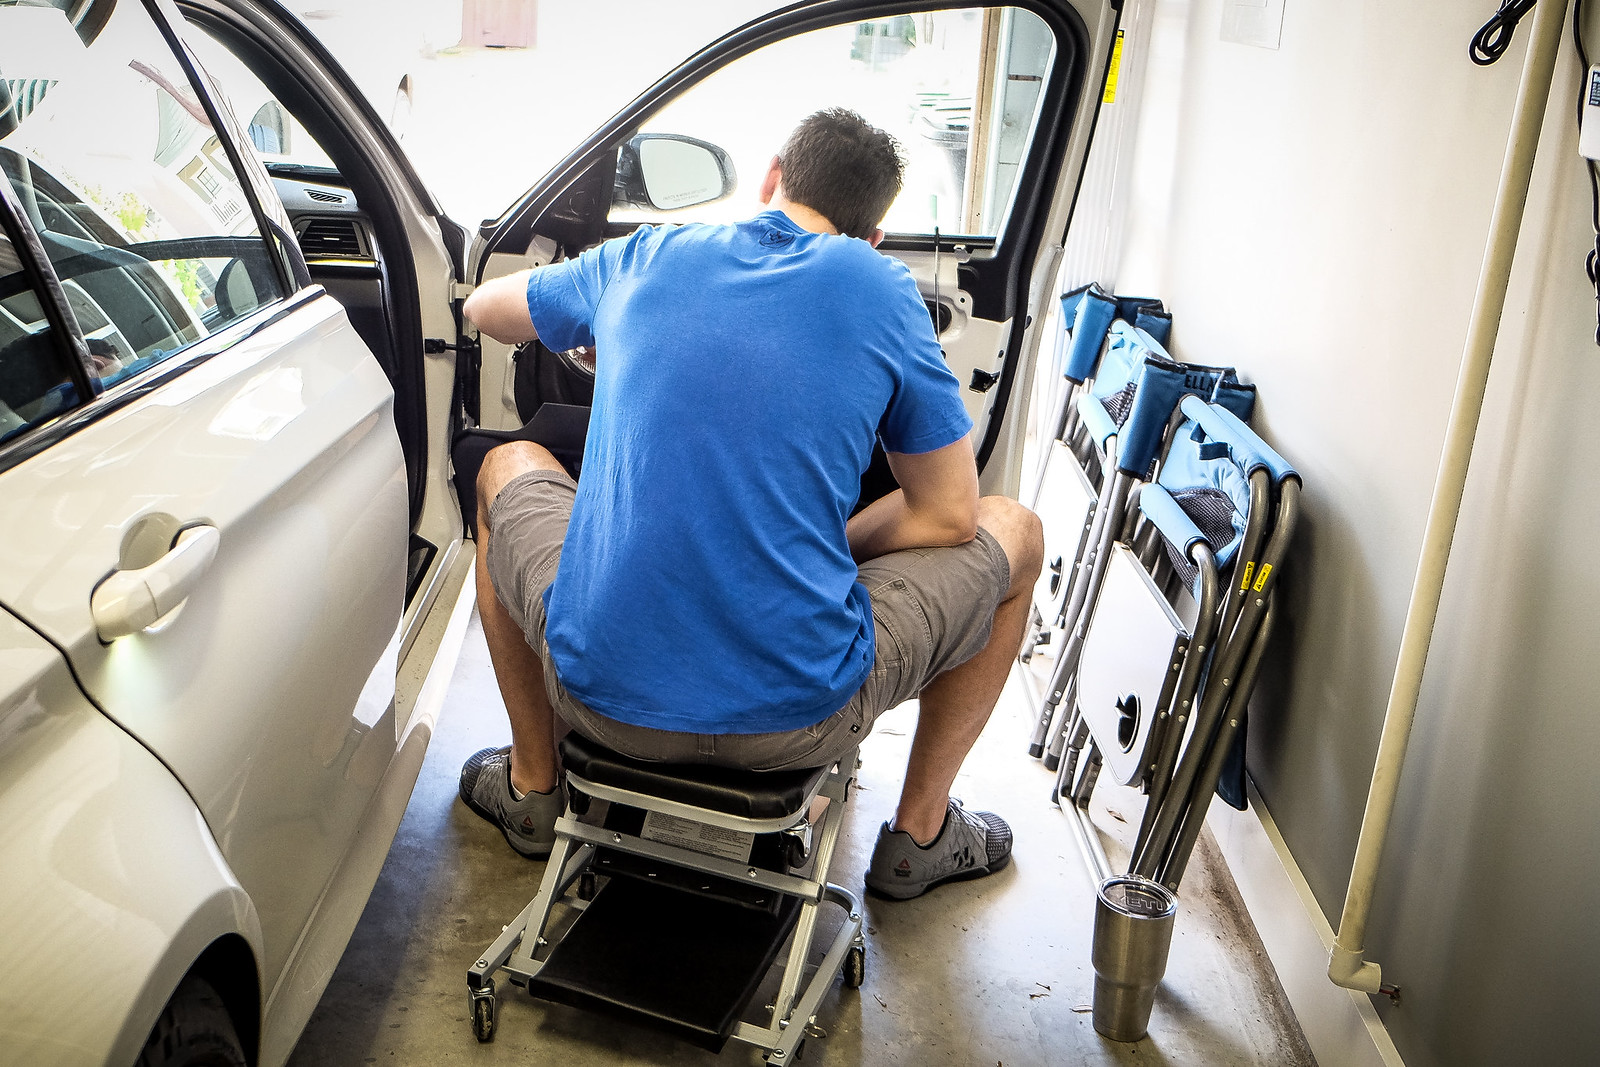
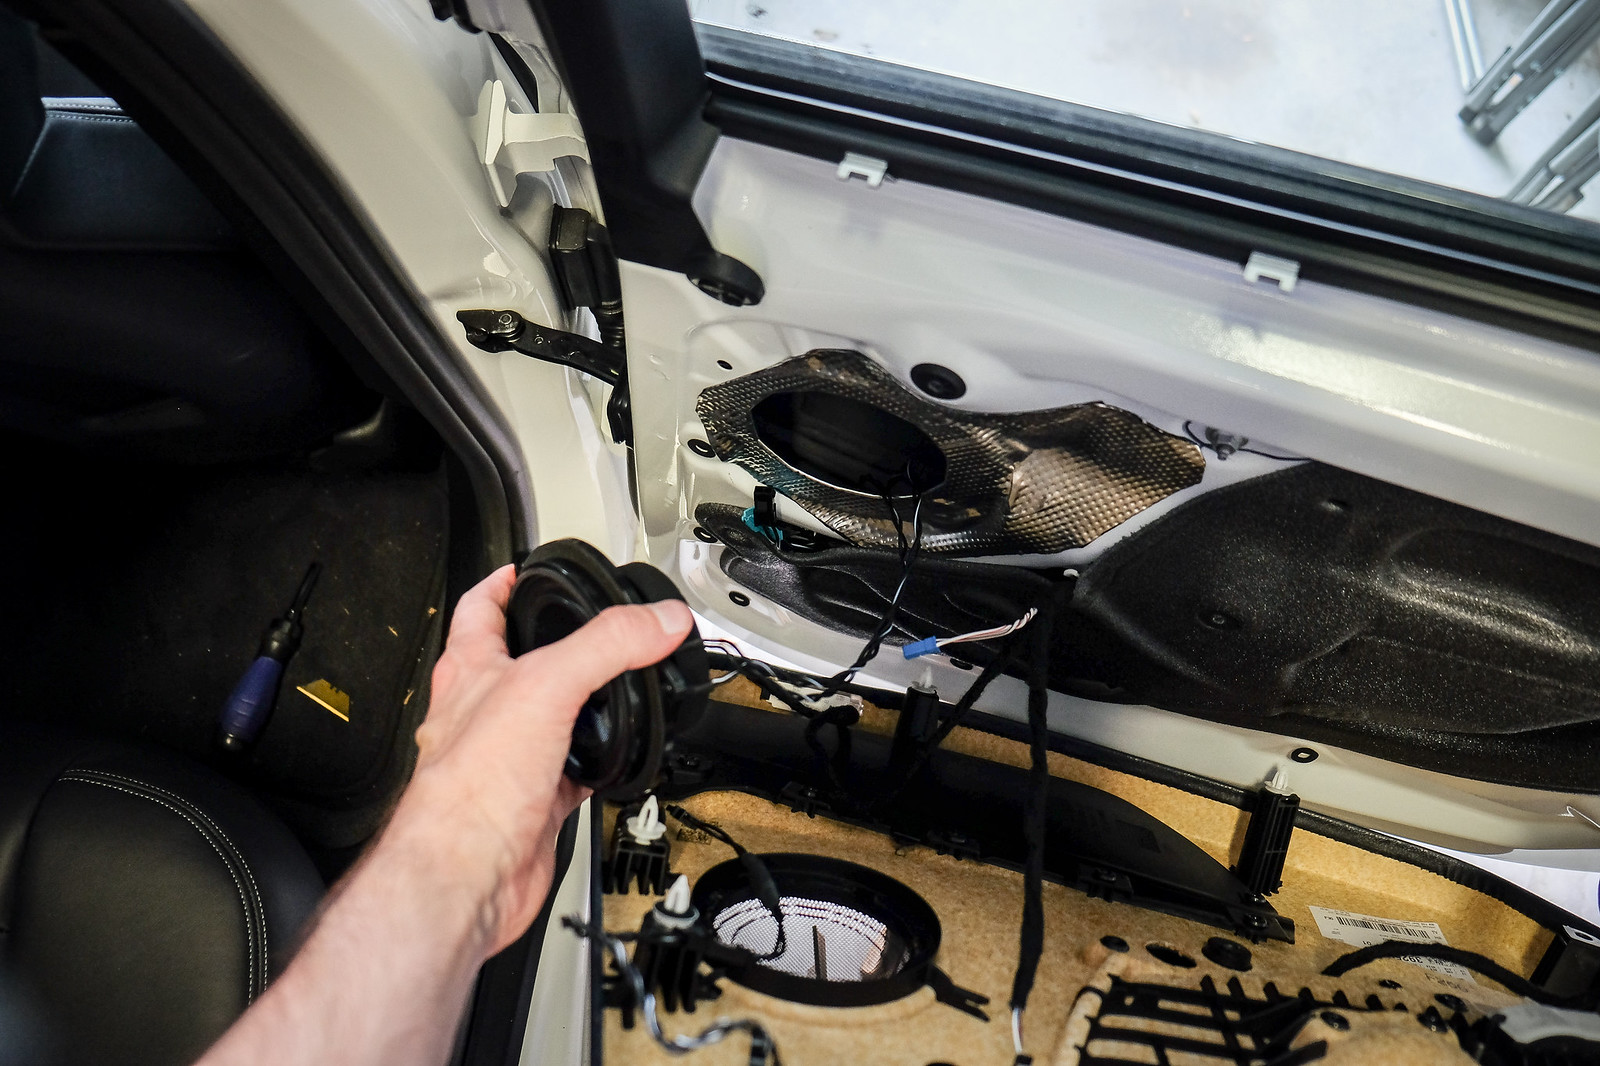
As others have recommended, do not disconnect the door panel. Leave everything connected, with the exception of a plug or two, to gain a bit of headroom, and set the panel on a box while working. This saves a good amount of time and prevents added risk of accidental damage when prying off the window/door lock mechanism. At that point, the speakers are very easily installed. One thing to note, however, is that I accidentally installed the thin foam rings that are should be placed between the door and speaker. Instead, I used 3M adhesive spray and installed them on the front of the speaker several weeks before the install DOH! After speaking with a good audiophile friend of mine and BAVSOUND, they stated that the rings are designed to prevent the speaker from rattling on the door panel. Luckily, no rattles are present.

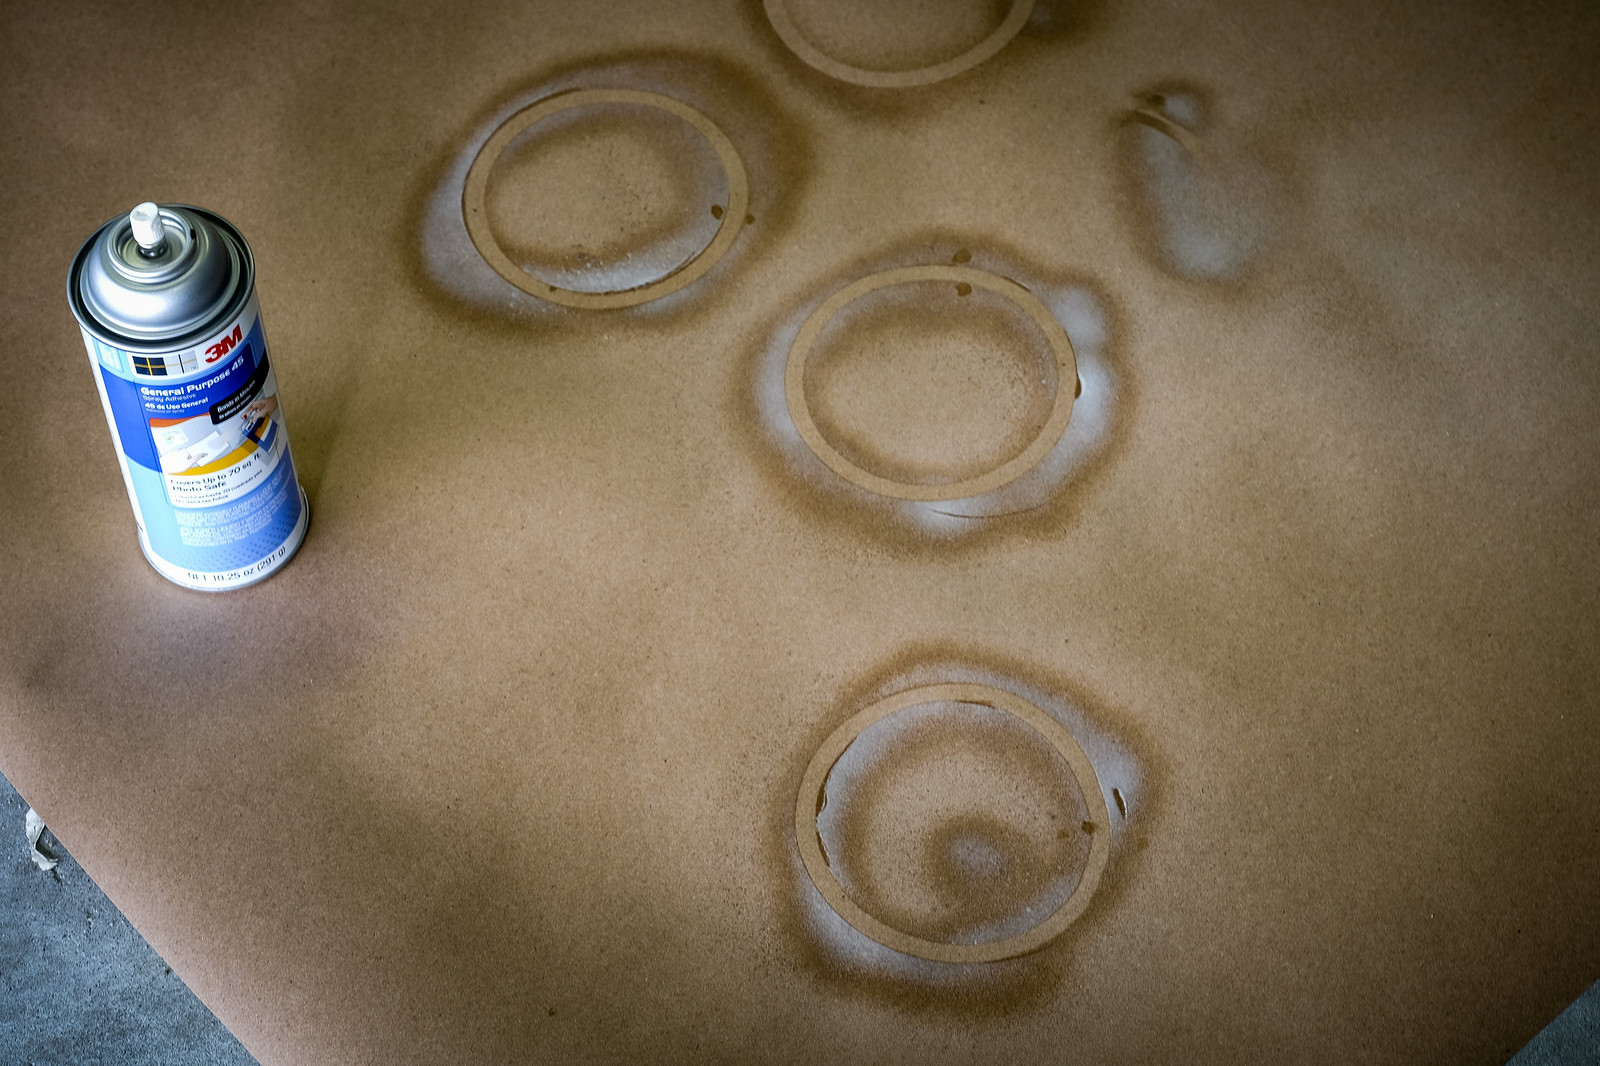
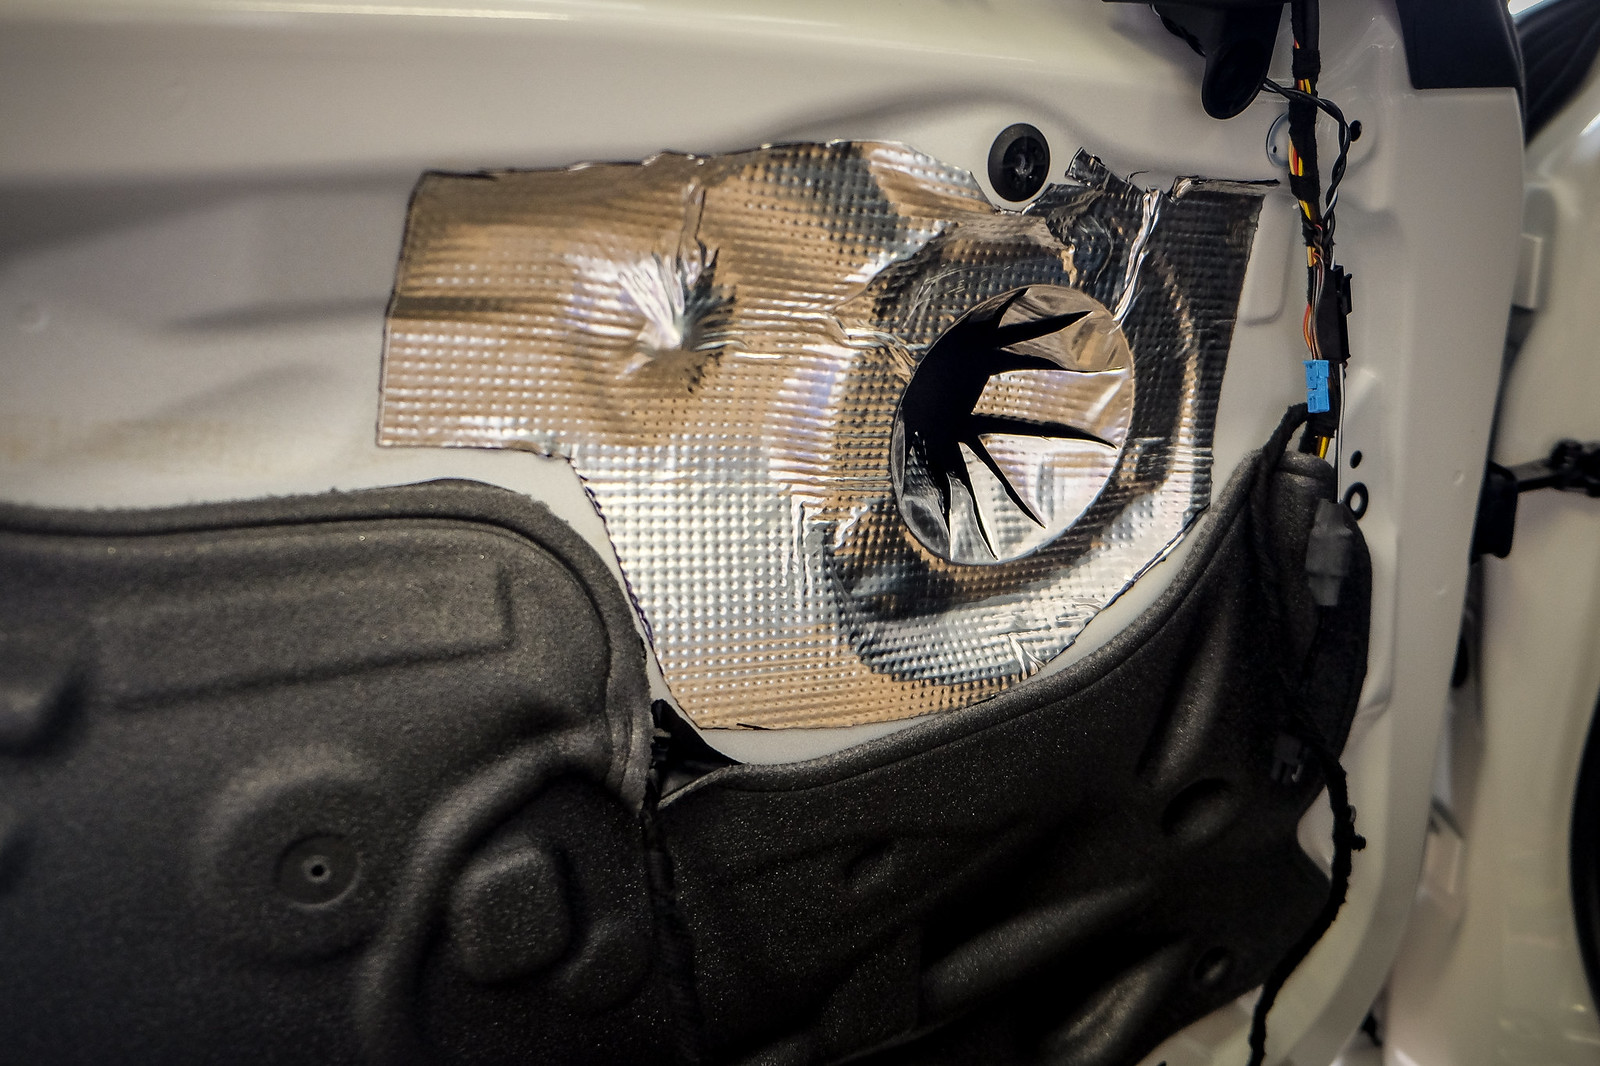
Next, create a paper template to use before cutting the sound deadening. Remember when cutting that this stuff is more function than form. Therefore, don't worry too much about beautifully laying it out unless you'll toss and turn in the coming nights knowing it wasn't a work of art.


The center channel was very simple provided that you have a tool similar to what BAVSOUND ships as a part of their toolkit. I ended up purchasing
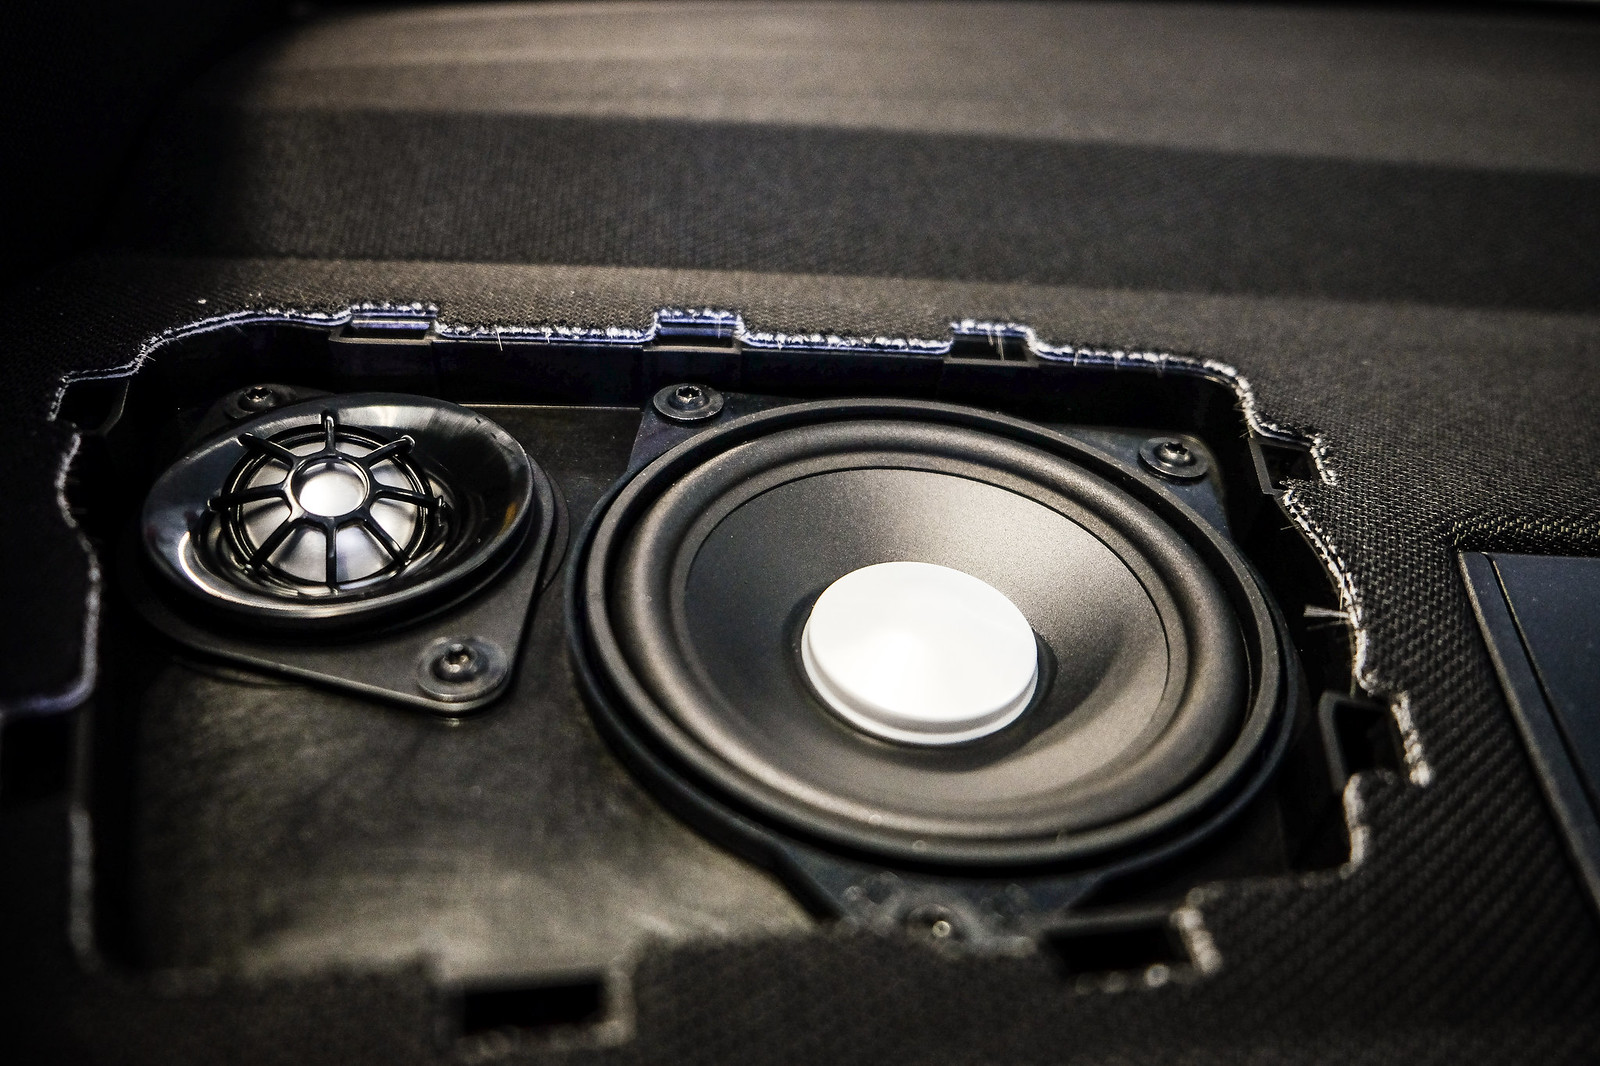
this tool and it worked like a champ. Due to the screw length and center channel speaker bracket, I ended up just snugging the center channel down to prevent stripping the holes by over-tightening. The back two speakers & tweeters on the rear deck are incredibly easy to replace - if only the entire system was this simple!!
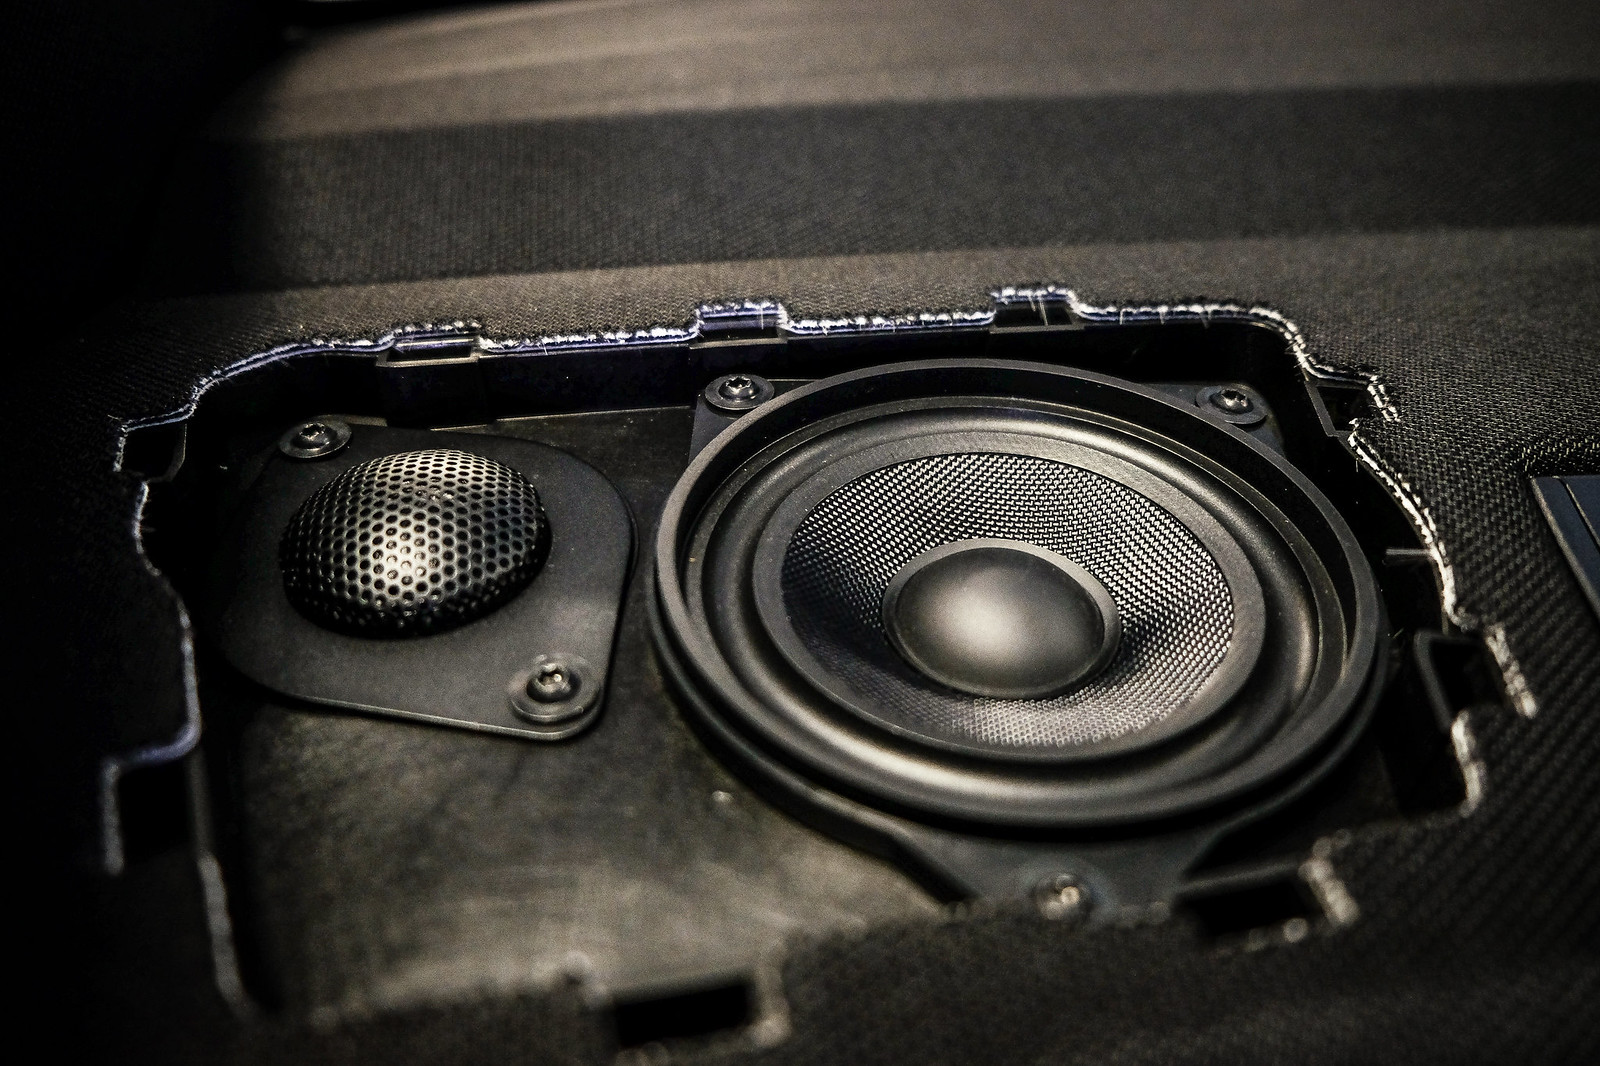
This is a bit hard to see, but I had to cut a small tab off of the tweeter mount on the rear door panels with a box cutter so that the BAVSOUND tweeter would click into place.
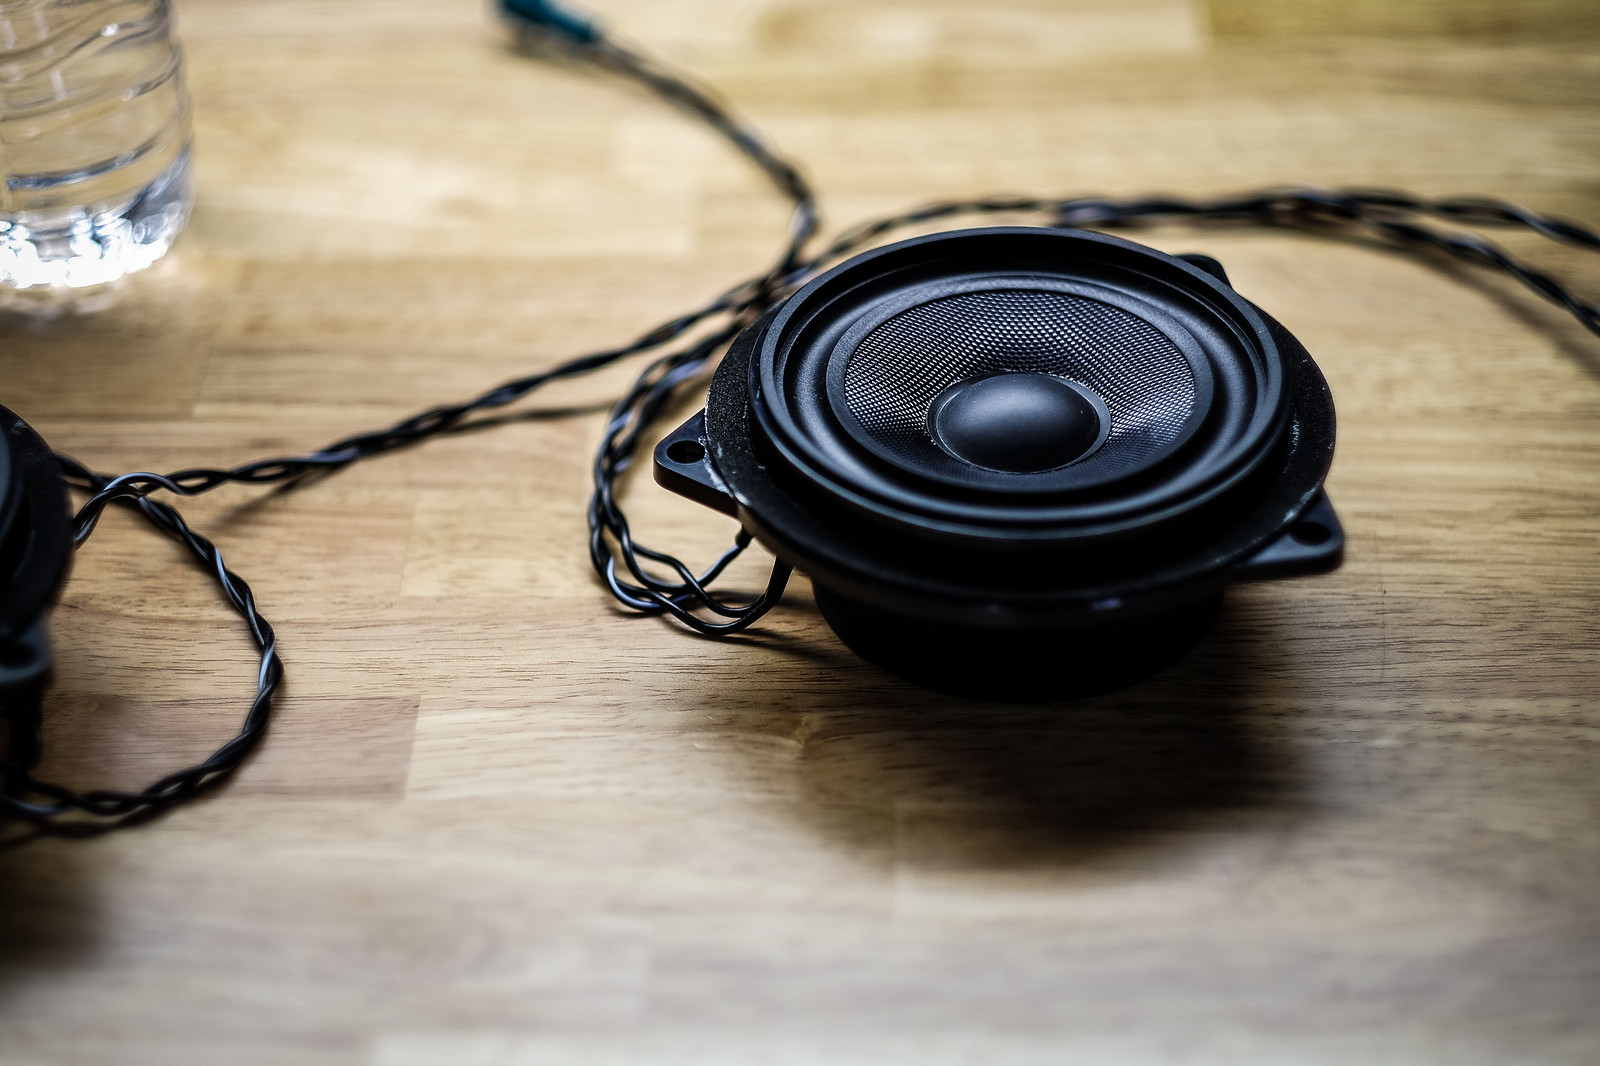
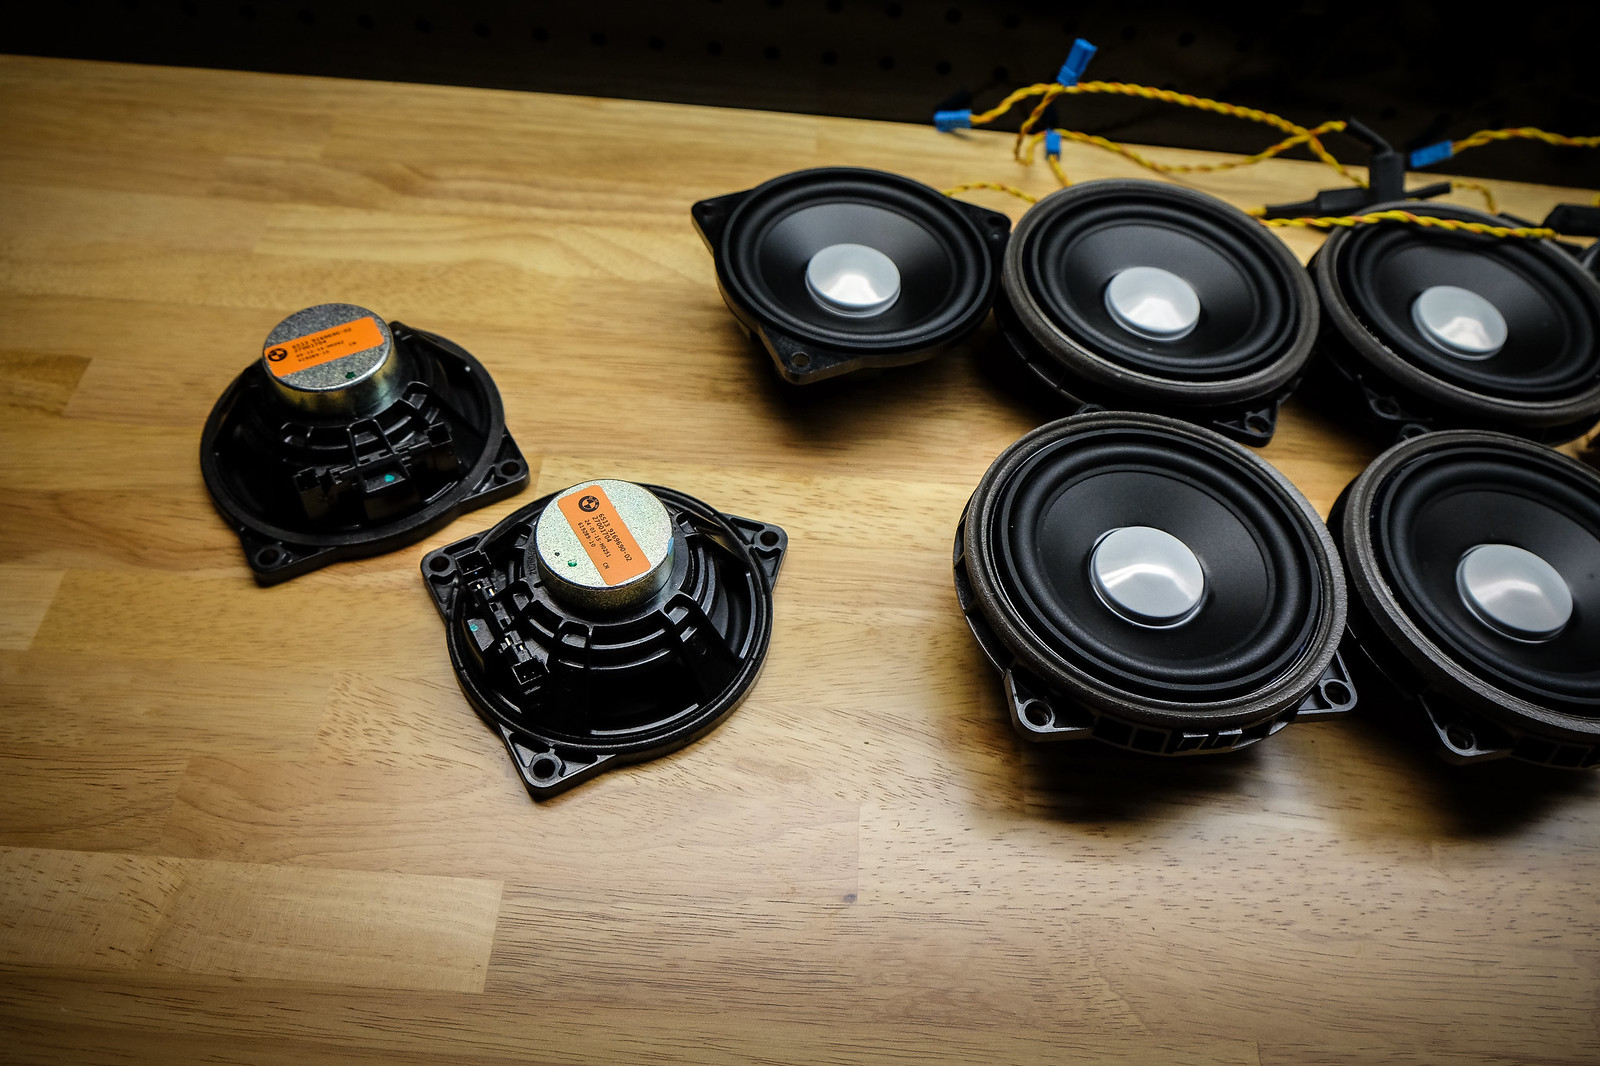
Its worth noting that the HK midranges were quite cheap feeling and light. However, the tweeters had decent weight to them. I suspect the BAVSOUND tweeters were only heavier due to the metal casing versus HKs plastic casing.
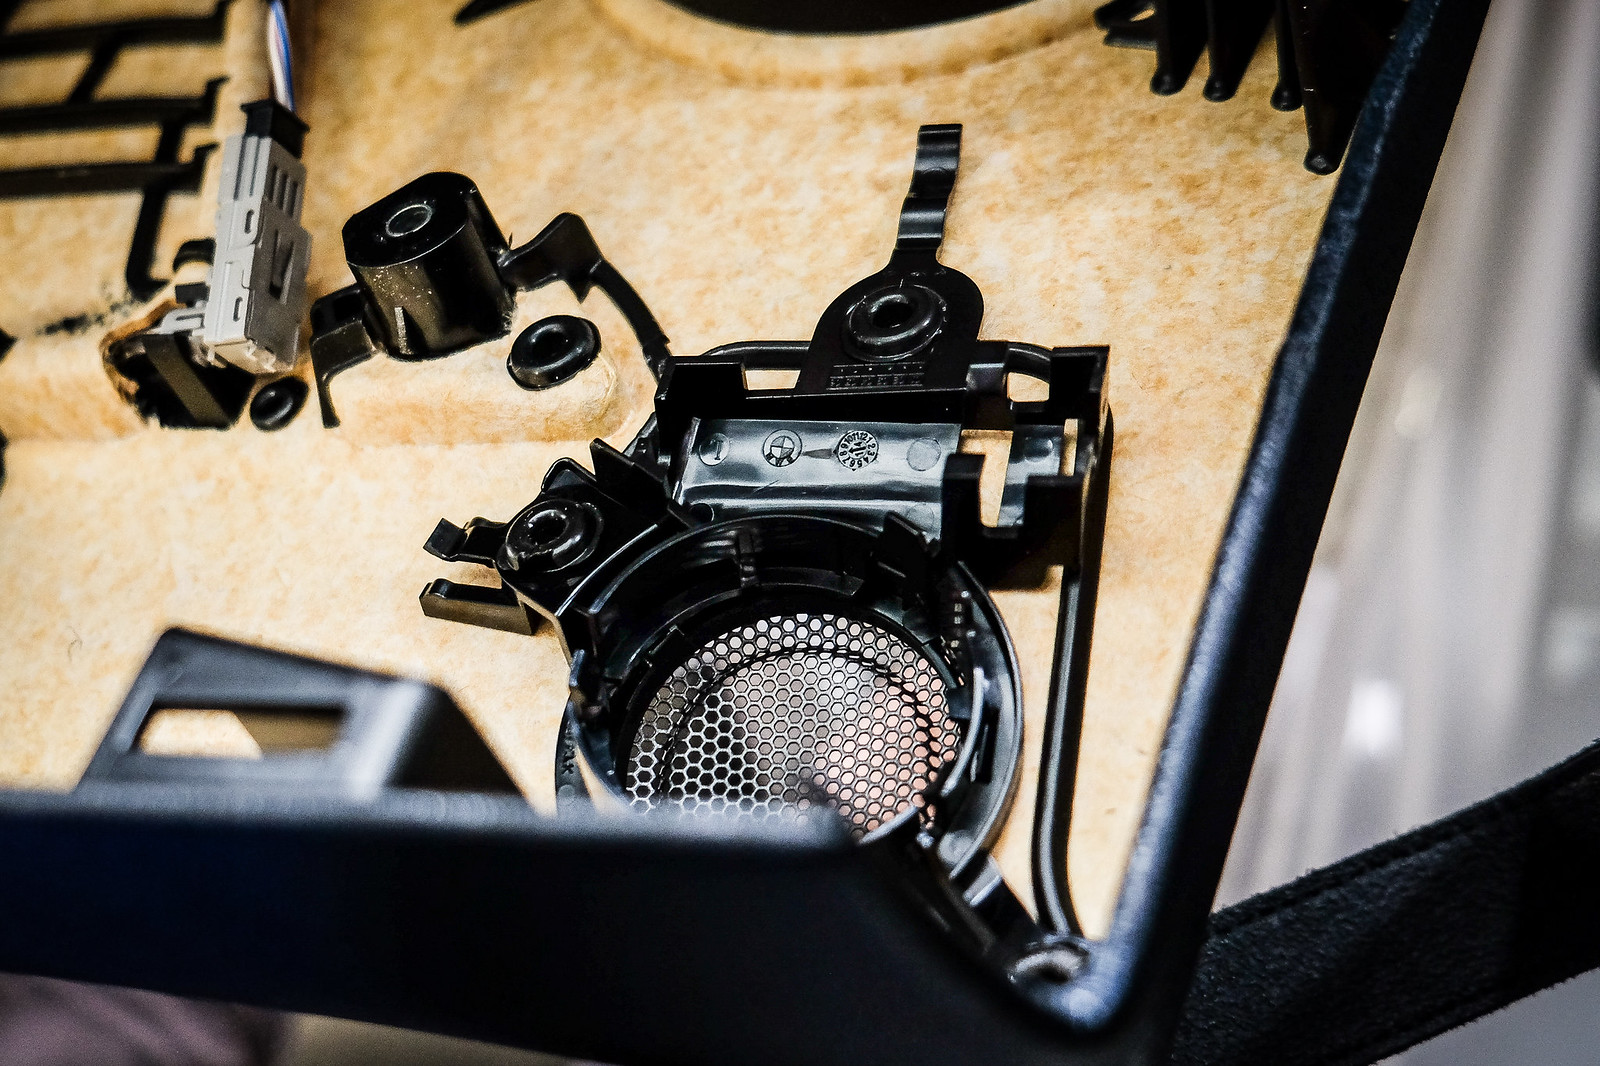
Yes, I made a boo-boo on the HK midrange on the far left

.
Sound
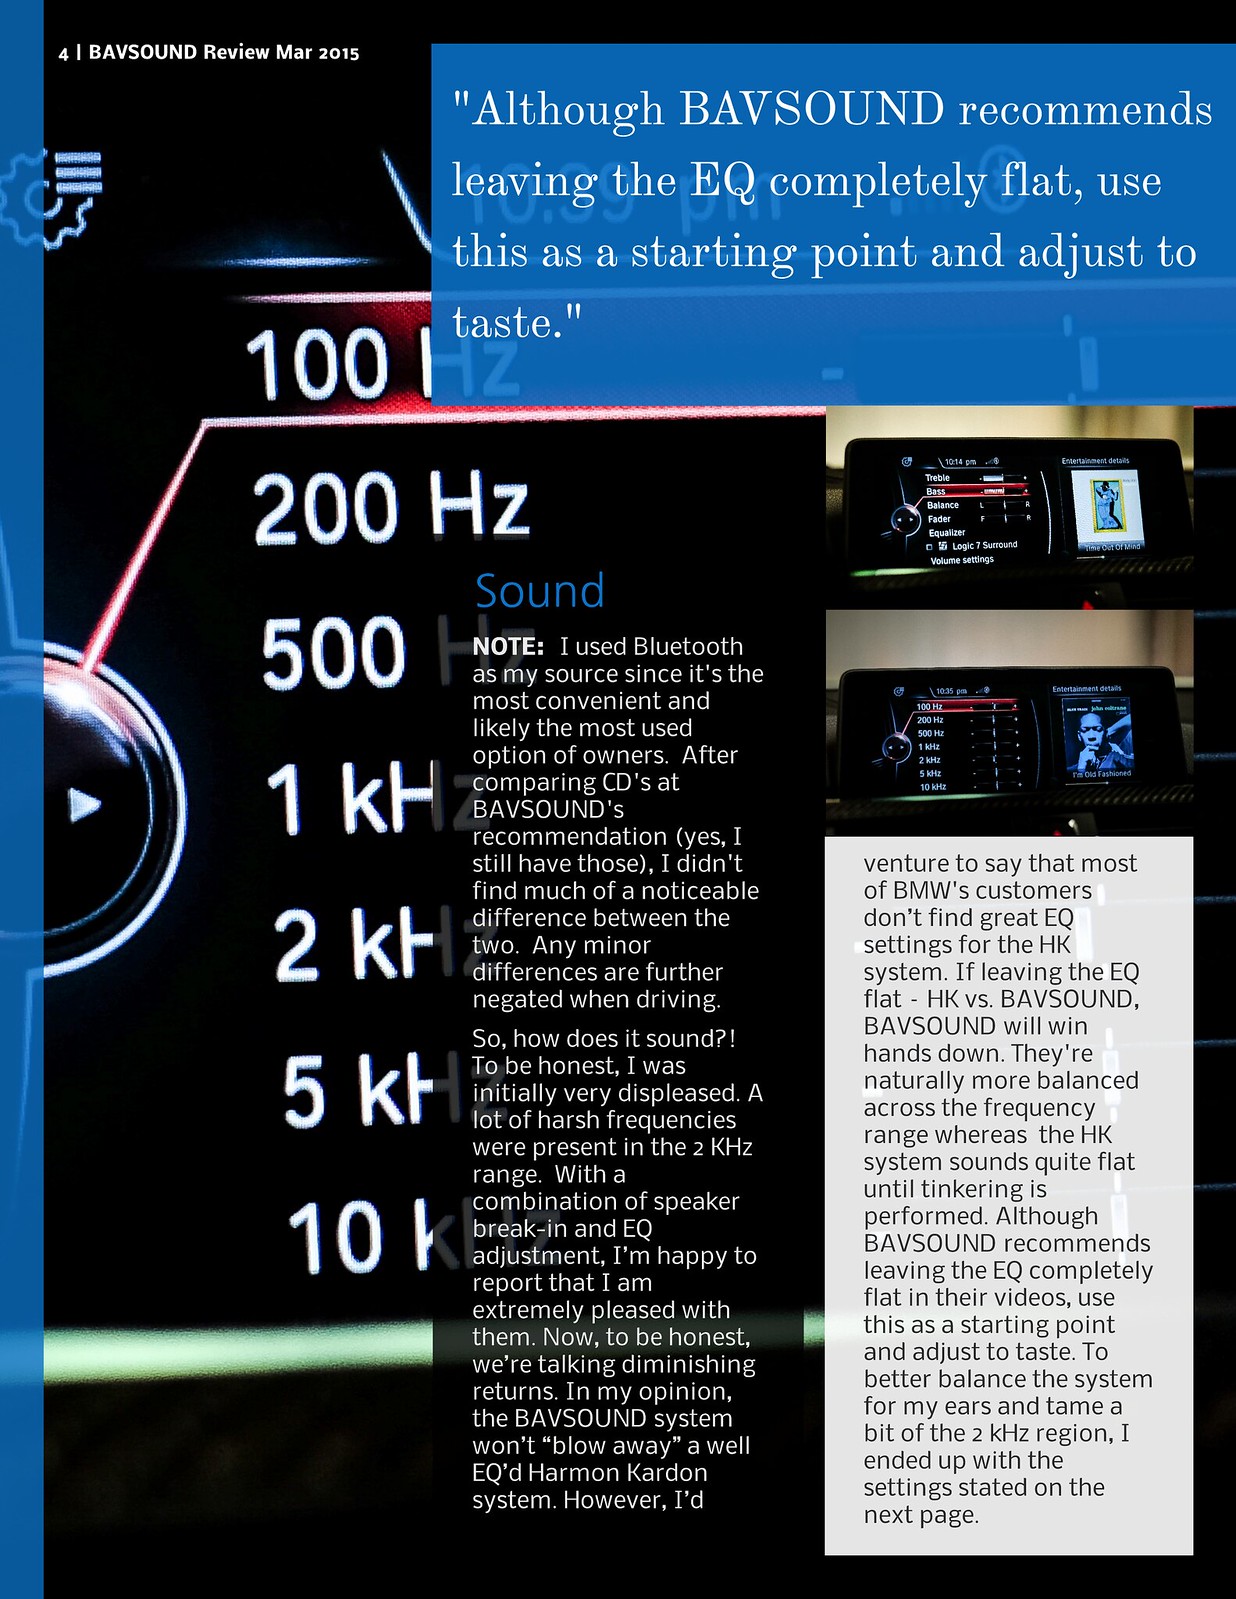
NOTE: I used Bluetooth as my source since it's the most convenient and likely the most used option of owners. After comparing CD's at BAVSOUND's recommendation (yes, I still have those), I didn't find much of a noticeable difference between the two. Any minor differences are further negated when driving.
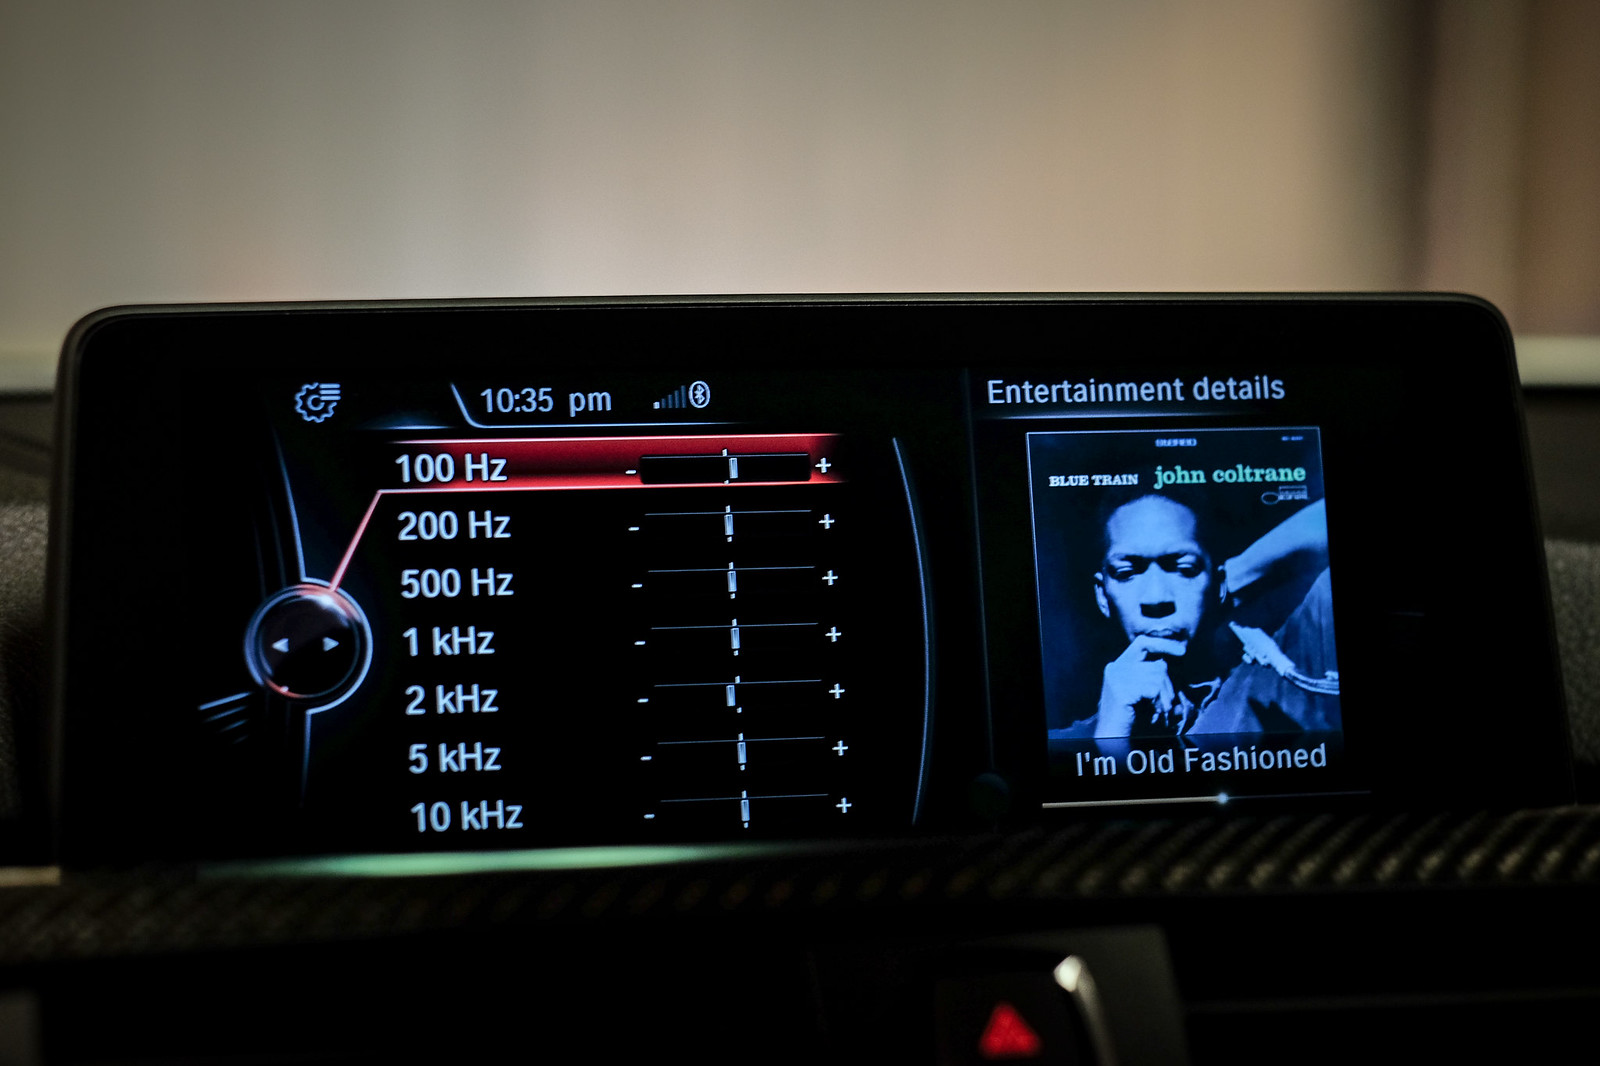
So, how does it sound?! To be honest, I was initially very displeased. A lot of harsh frequencies were present in the 2 KHz range. With a combination of speaker break-in and EQ adjustment, Im happy to report that I am extremely pleased with them. Now, to be honest, were talking diminishing returns. In my opinion, the BAVSOUND system wont blow away a well EQd Harmon Kardon system. However, Id venture to say that most of BMW's customers dont find great EQ settings for the HK system. If leaving the EQ flat HK vs. BAVSOUND, BAVSOUND will win hands down. They're naturally more balanced across the frequency range whereas the HK system sounds quite flat until tinkering is performed. Although BAVSOUND recommends leaving the EQ completely flat in their videos, use this as a starting point and adjust to taste. To better balance the system for my ears and tame a bit of the 2 kHz region, I ended up with the following settings.
"Driving" Settings:
Treble: 0
Bass: +2
Balance: 0
Fader: 0
Logic 7: OFF
100 Hz: +2
200 Hz: 0
500 Hz: 0
1 kHz: +1
2 kHz: -3
5 kHz: 0
10 kHz: 0
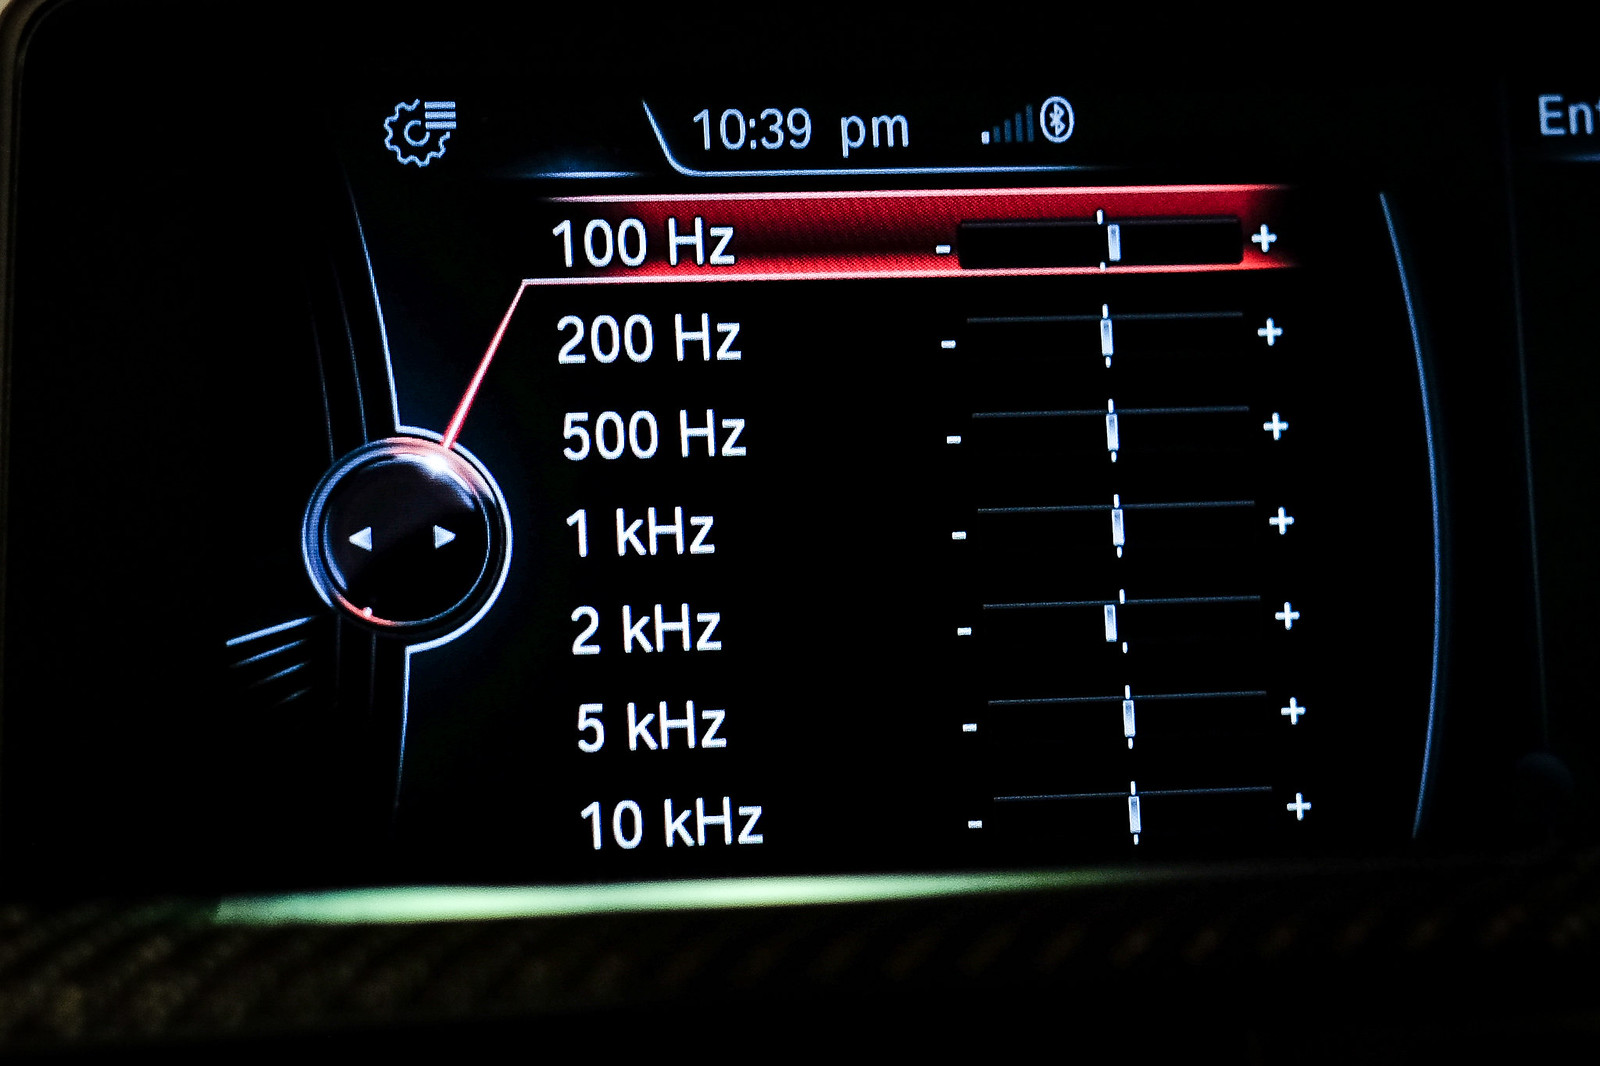
After using the following settings, I became very pleased with the system. Its incredibly tight. As others have mentioned, the mid-bass is much more present and overall the system sounds more natural over the frequency spectrum.
I like a lot of genres for music, but Im mostly into Blues, Rock, and Jazz. I dabble in other genres as well (good music is good music), but I used those as my testing ground due to my familiarity with how they should sound.
Im Old Fashioned by John Coltrane
This song sounds fantastic on this system. The piano is clear, the trumpet and saxophone are crisp, and the cymbals/drums sizzle. Everything sounds airy, as they should with this recording. No instruments or frequencies overpowered one another and it was sublime. The system also remains quite balanced with instruments panned to either the left or right while representing space quite well.
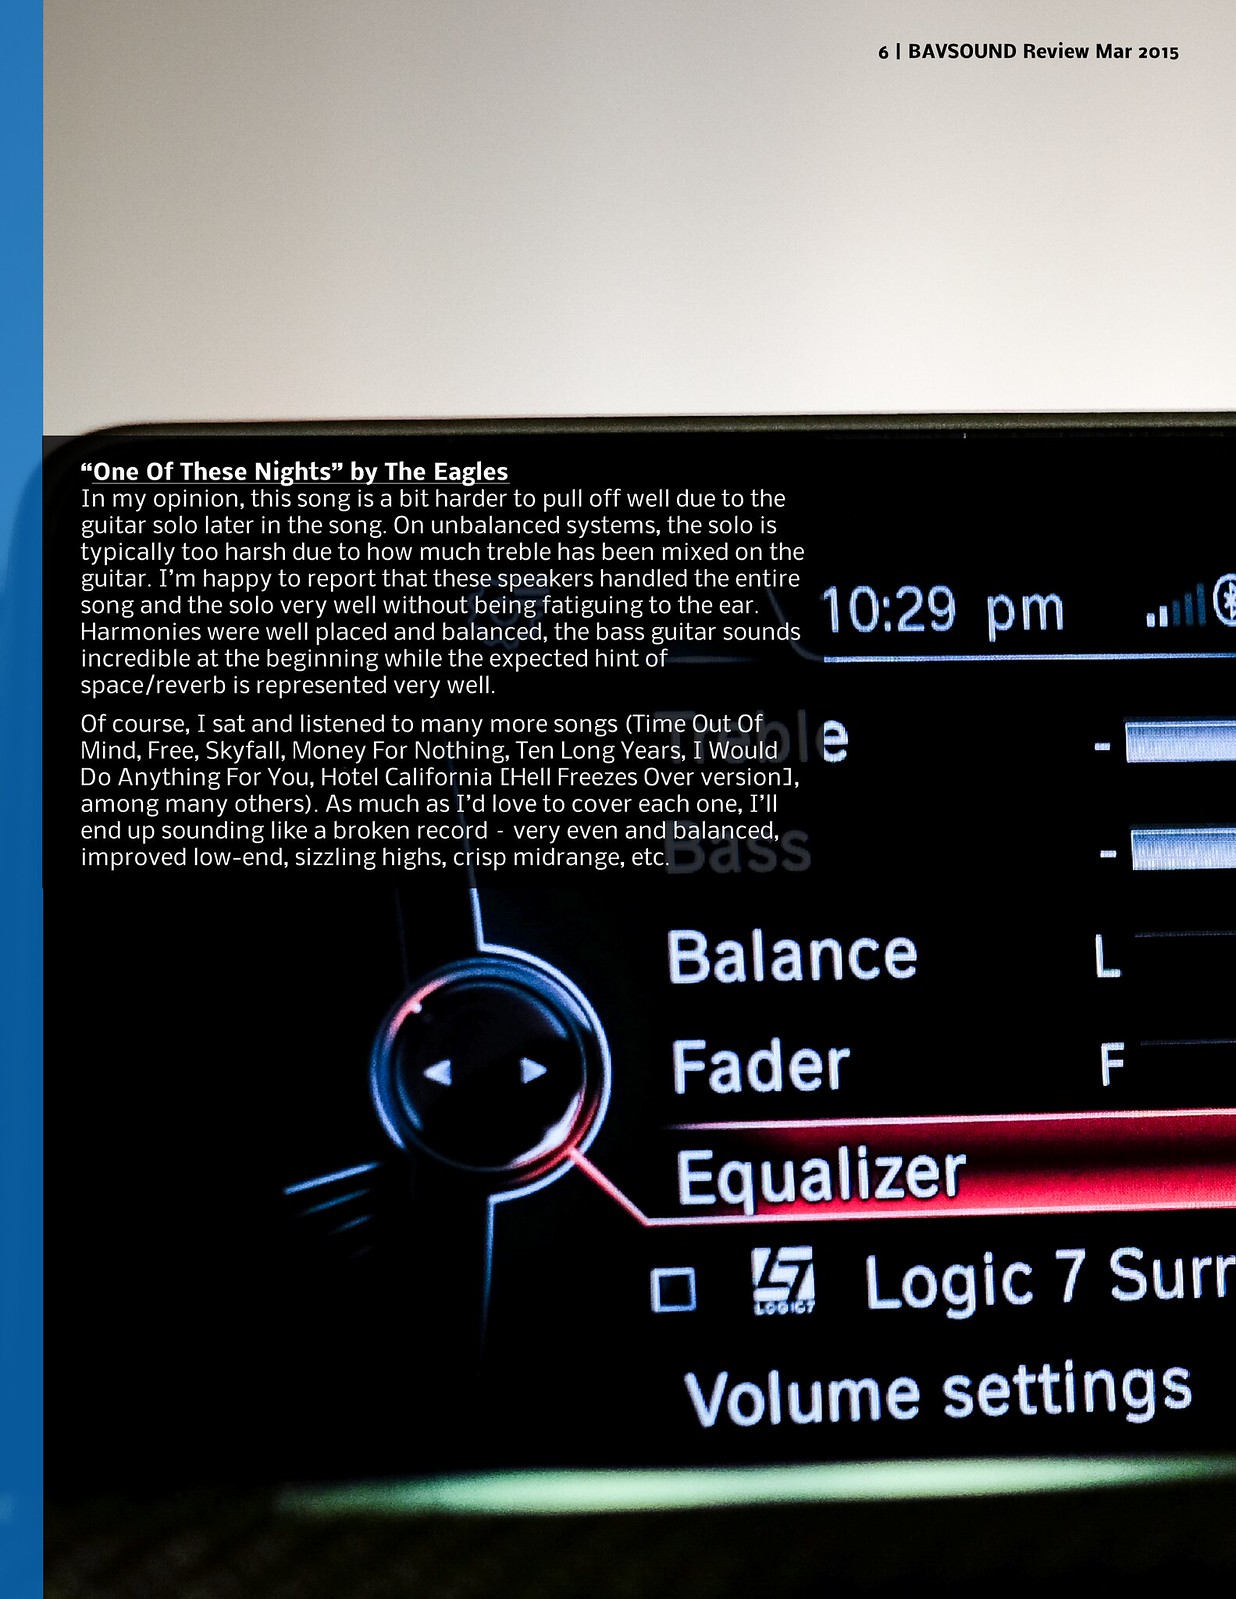
One Of These Nights by The Eagles
In my opinion, this song is a bit harder to pull off well due to the guitar solo later in the song. On unbalanced systems, the solo is typically too harsh due to how much treble has been mixed on the guitar. Im happy to report that these speakers handled the entire song and the solo very well without being fatiguing to the ear. Harmonies were well placed and balanced, the bass guitar sounds incredible at the beginning while the expected hint of space/reverb is represented very well.

Of course, I sat and listened to many more songs (Time Out Of Mind, Free, Skyfall, Money For Nothing, Ten Long Years, I Would Do Anything For You, Hotel California [Hell Freezes Over version], among many others). As much as Id love to cover each one, Ill end up sounding like a broken record very even and balanced, improved low-end, sizzling highs, crisp midrange, etc.
Conclusion: Should I Buy?
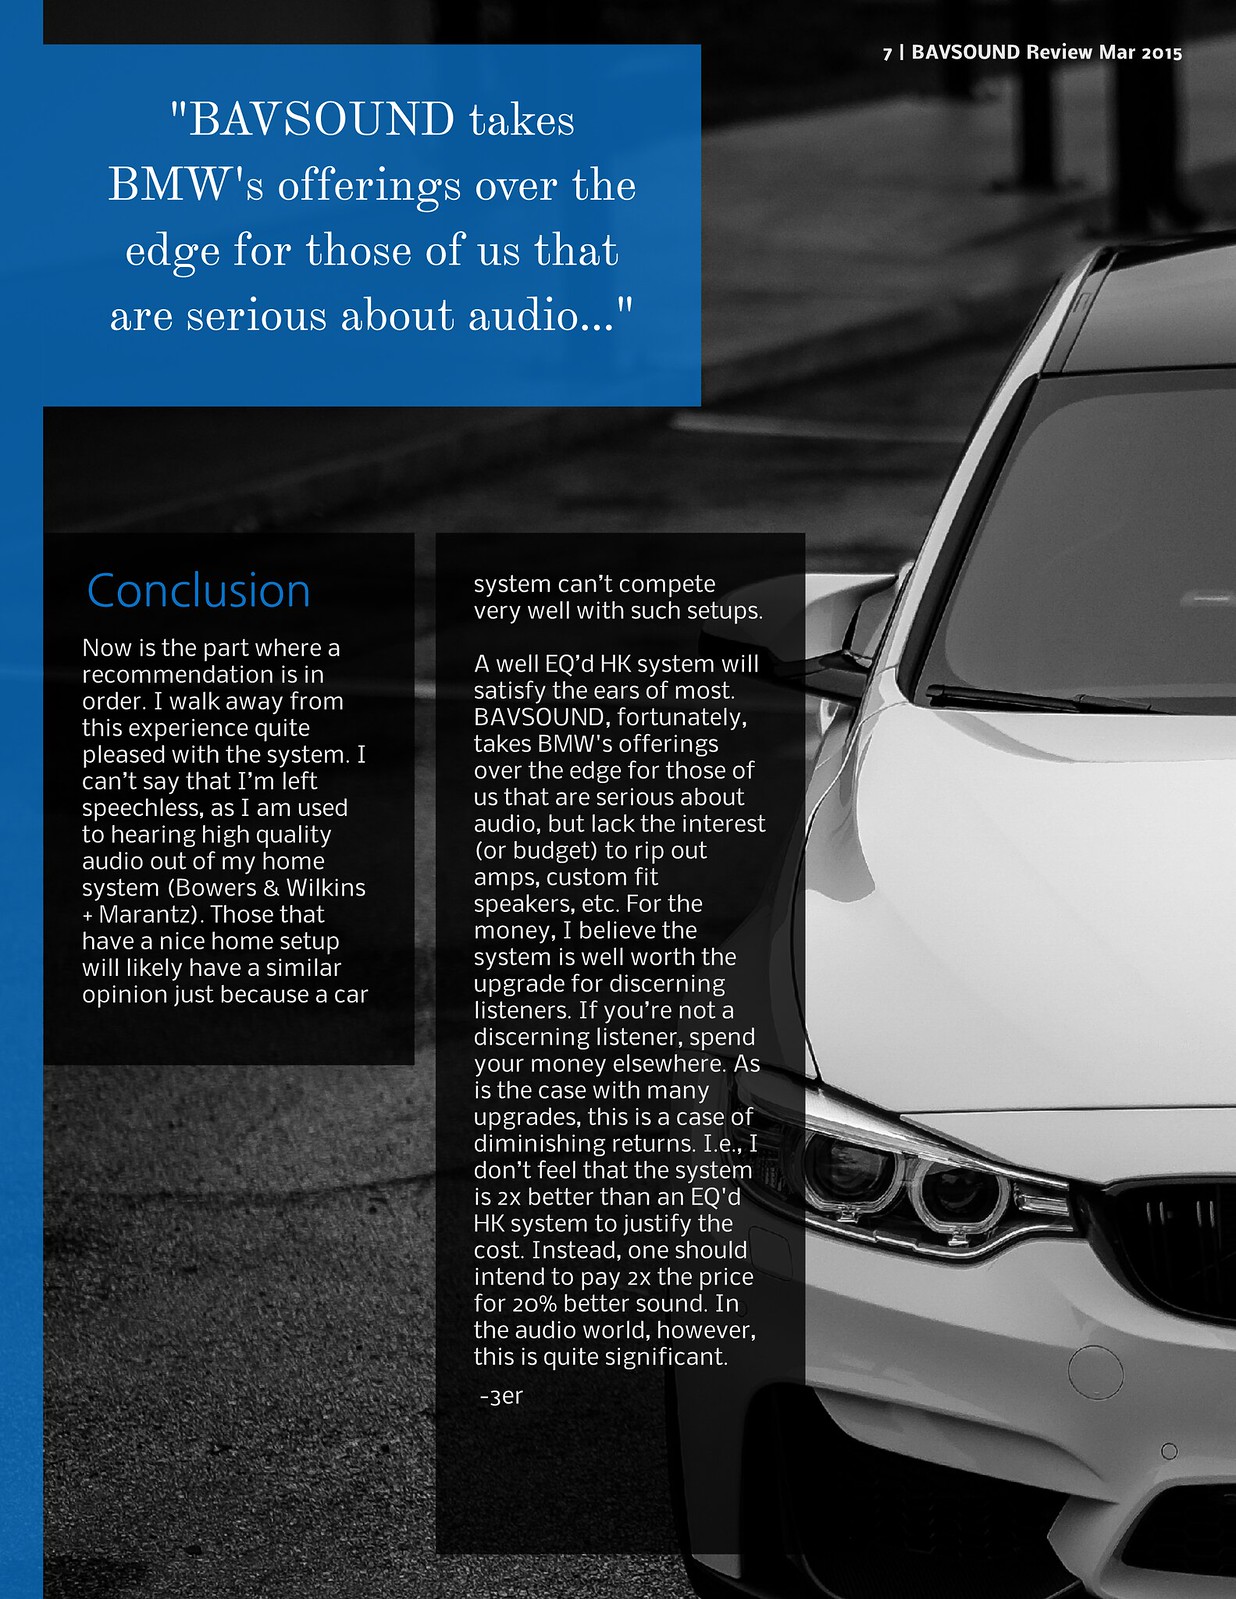
Now is the part where a recommendation is in order. I walk away from this experience quite pleased with the system. I cant say that Im left speechless, as I am used to hearing high quality audio out of my home system (Bowers & Wilkins + Marantz). Those that have a nice home setup will likely have a similar opinion just because a car system cant compete very well with such setups.
A well EQd HK system will satisfy the ears of most. BAVSOUND, fortunately, takes BMW's offerings over the edge for those of us that are serious about audio, but lack the interest (or budget) to rip out amps, custom fit speakers, etc. For the money, I believe the system is well worth the upgrade for discerning listeners. If youre not a discerning listener, spend your money elsewhere. As is the case with many upgrades, this is a case of diminishing returns. I.e., I dont feel that the system is 2x better than an EQ'd HK system to justify the cost. Instead, one should intend to pay 2x the price for 20% better sound. In the audio world, however, this is quite significant.
-3er
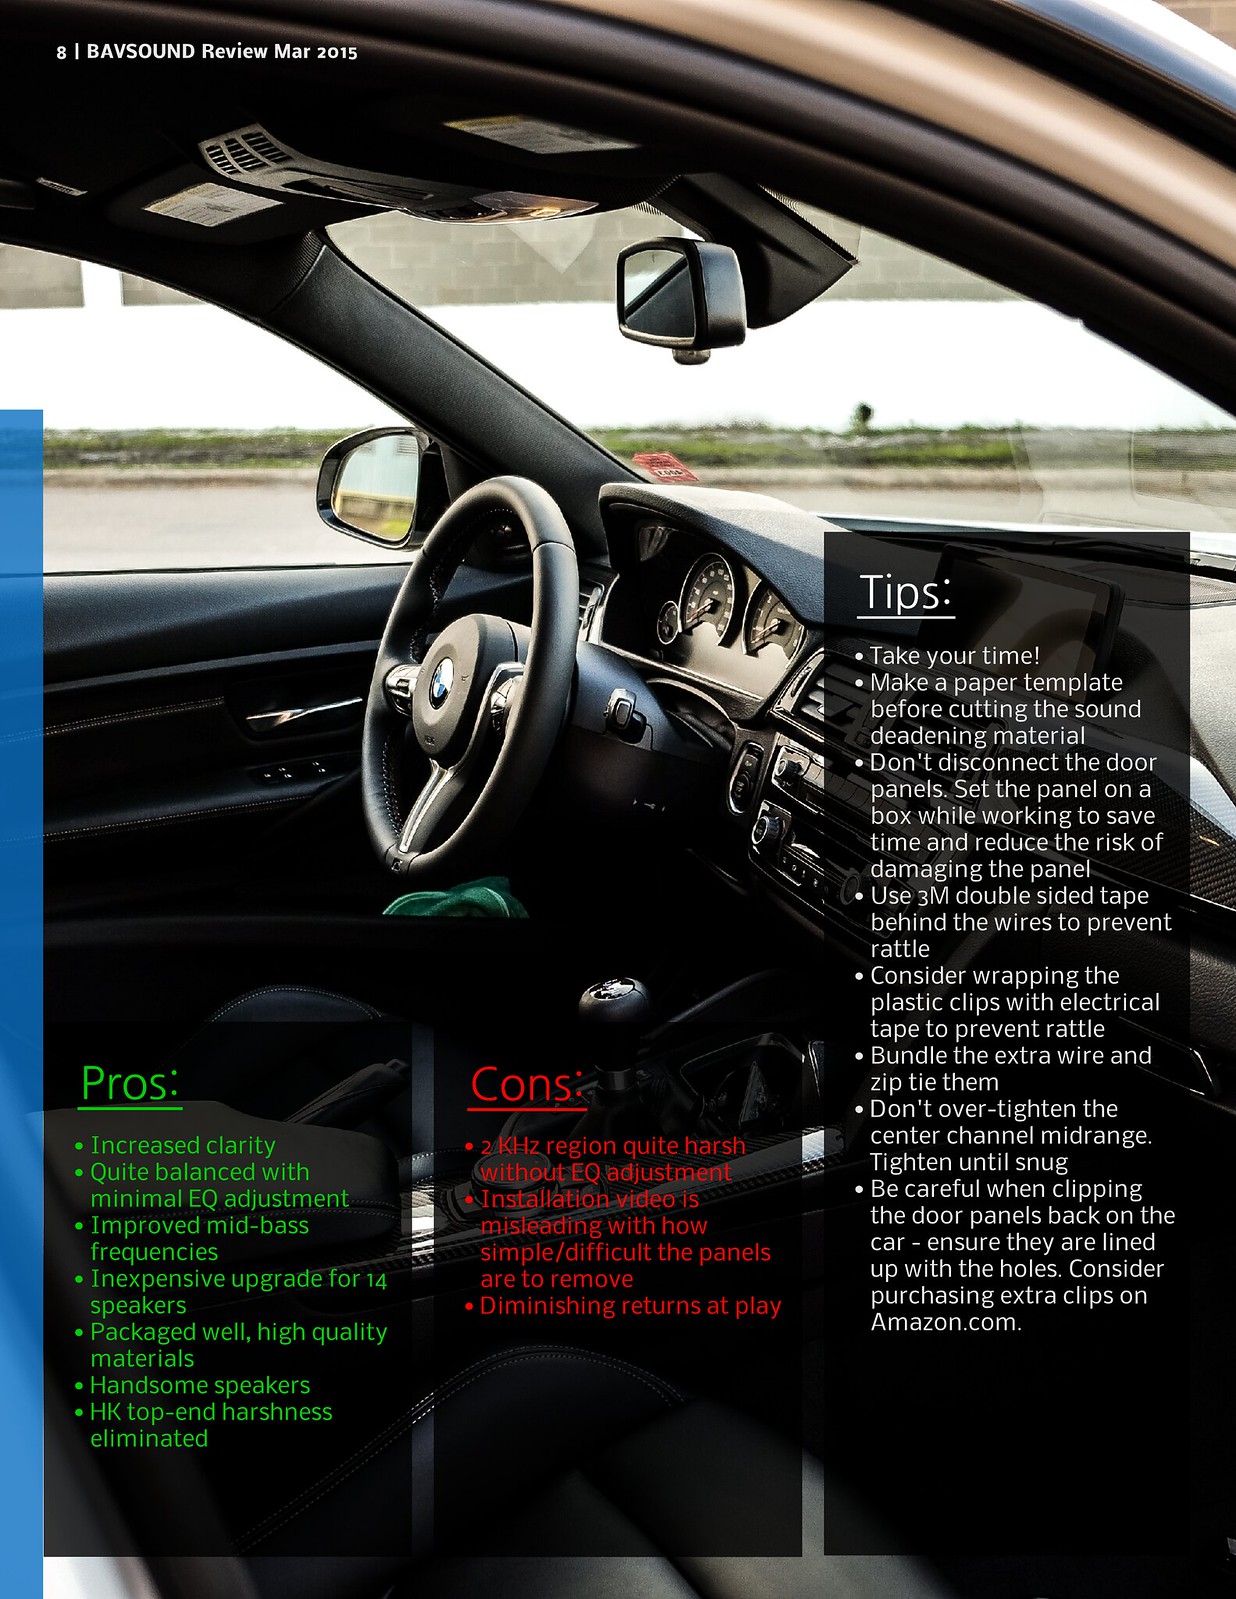
Pros:
- Quite balanced with minimal EQ adjustment
- Improved mid-bass frequencies
- Inexpensive upgrade for 14 speakers
- Packaged well, high quality materials
- Handsome speakers/tweeters
- HK top harshness eliminated
Cons:
- 2 KHz region a bit harsh without EQ adjustment
- Installation video is misleading with how simple/difficult the panels are to remove
- Diminishing returns at play
Tips:
- Take your time!
- Make a paper template before cutting the sound deadening material
- Don't disconnect the door panels. Set the panel on a box while working to save time and reduce the risk of damaging the panel
- Use 3M double sided tape behind the wires to prevent rattle
- Consider wrapping the plastic clips with electrical tape to prevent rattle
- Bundle the extra wire and zip tie them
- Don't over-tighten the center channel midrange. Tighten until snug
- Be careful when clipping the door panels back on the car - ensure they are lined up with the holes. Consider purchasing extra clips found here
Update: April 13, 2015
After having the system installed for a few weeks, I noticed door rattles on two of the four panels. After further inspection, I found that I flattened a few of the clips when putting the panels back on. This might sound obvious, but be very careful when reattaching the door panels to ensure each clip lines up with its respective hole. Without doing so, you're very likely to flatten a few. I replaced the few that were flattened with some OEM units from Amazon (
link here). Surprisingly, they're of higher quality than the white original clips and the foam is a touch thicker.
I also found a few original clips in which the thin foam rubber pad that goes between it and the door panel had fallen off during the speaker install. After replacing those (take them from the set you get from Amazon) and putting just a 2" strip of 3M double-sided foam pad between the bottom edge of the door panel where it could rattle against the bare metal, I have been rattle free.
I'm not sure which of the fixes actually remediated the problem, but I did not want to remove the door panel again (of which I now feel like a pro, lol)!